...
| Info | ||
|---|---|---|
| ||
This guide is subject to change as development of the new submission platform is enhanced with new features. This manual is for the staging environment for registries to test their xml format data file uploads. |
Purpose
This document describes the manual upload method of an PGP encrypted XML file through the new submission platform. As part of continuous effort to streamline and enhance functionality for our registry users, BMDW have been developing the new data submission services in line with the file format transition from .Dot20 to XML. The automatic upload method via a REST API [1] will become available later as well as the corresponding manual.
...
- To do this, click on your home page on the settings button.
- A drop-down menu will appear and then click on 'My Account'.
- In the next window, click on the button 'change password' in the left bottom corner
- A new smaller window will open. Fill out your old password and your new chosen password and click on OK.
Tip: If you haven’t changed your password for a long time, we recommend that you do so to ensure that your profile is secure. We recommend that you change your password every 6 months.
...
To close and exit click on the Settings button next to your name on the top left side (Figure 4). This should give you a drop-down menu with 'log out'. Click on 'Log out' and you will be redirected to the login screen.
Please note: Please do PLEASE NOTE: Do not simply close your browser; otherwise your unsaved data may be lost.
| Imagefloat | ||
|---|---|---|
| ||
|


...
- Your name: On the top left corner. This is the name of the user that logged into the system
- Notification indicator: This is the bell that will highlight if you have any new notifications around the status of your uploaded file
- Setting button: This is the menu for functions like - Logout and Updating account details
- Search box
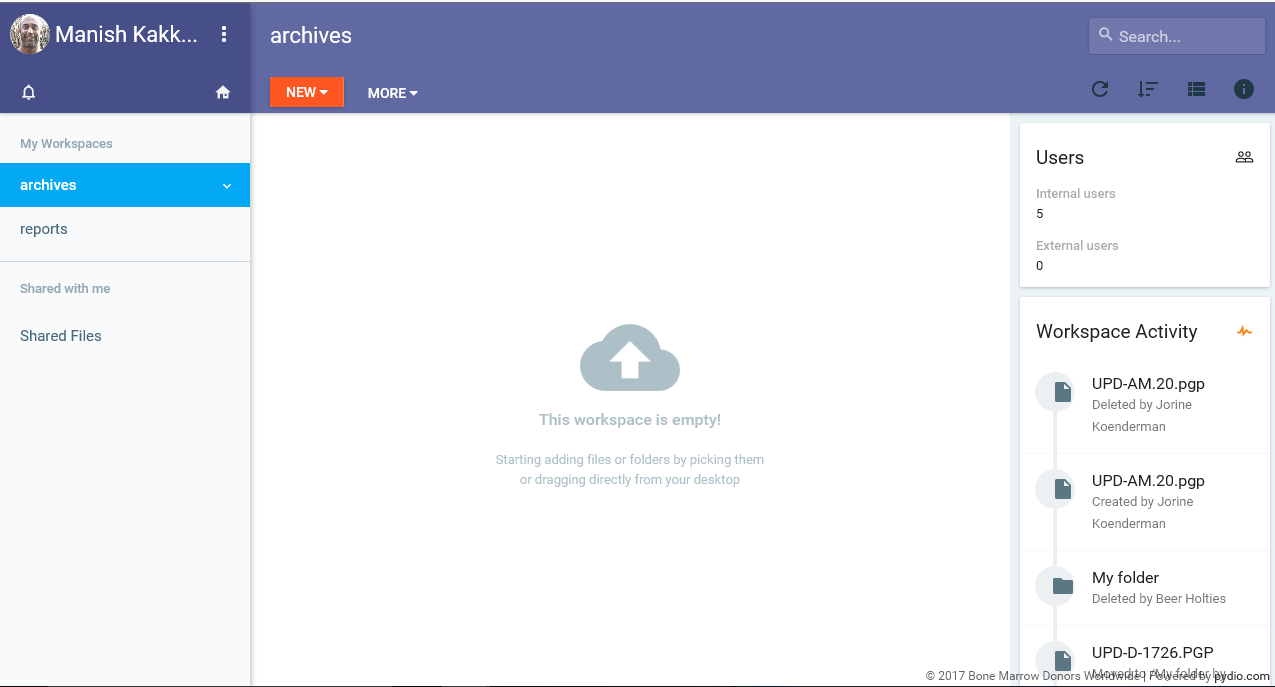
- My workspace: Your own workspace named with the ION of your organisation. In conjunction with your workspace you also see two separate folders called Archives and Reports. For further details on the purpose of these folders please see section xxx
- Recent history of submissions in the middle main pane
PLEASE NOTE: On the left hand side you can see the workspace for your registry that you have access to. Most organisations will have access to just one space even if you are submitting data on behalf of other registries.
| Imagefloat | ||
|---|---|---|
| ||
|

...
Workspace: Within your Workspace you can find the list of uploaded files
...
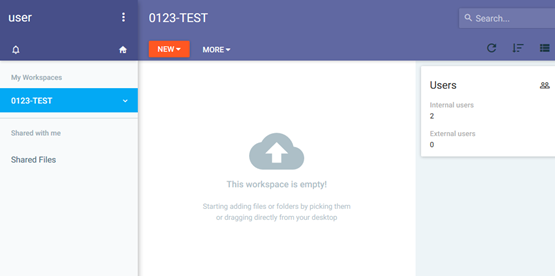
When you login for the first time, the Workspace will be empty (Figure 6).
| Imagefloat | ||
|---|---|---|
| ||
|
...
will appear with your
...
| Imagefloat | ||
|---|---|---|
| ||
|
latest "Workspace activity" on the right hand menu. This menu shows the processes that your files have been through and also what stage the file is at.
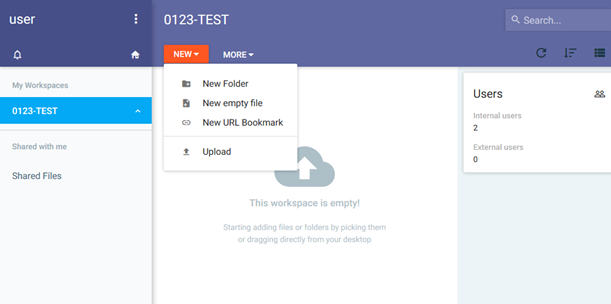
Upload a file
If you wish to upload a new PGP encrypted XML file into your workspace in order for BMDW to process the file, please follow the next steps:
- Click on the Workspace of your organisation.
- Within your Workspace click on the red tab with 'New' and then on the 'Upload' icon at the bottom of the drop-down menu (Figure 7).
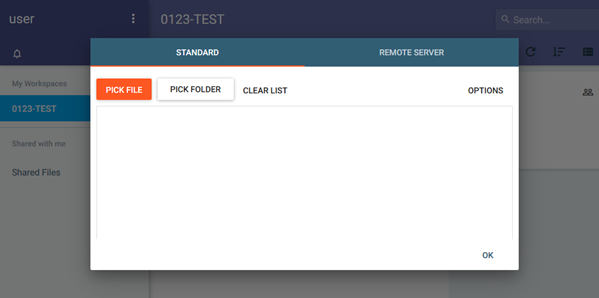
- A new screen will open where you can select your file for upload (Figure 88a).
- Click on the red button with 'Pick File'.
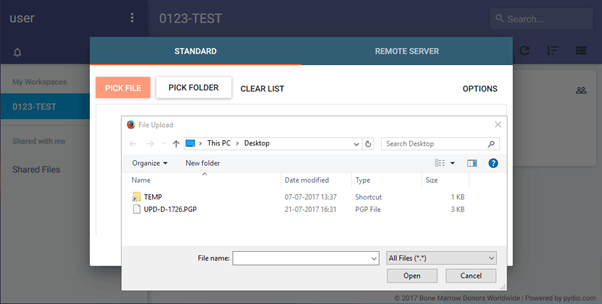
- A browser window will open and you can select the file on your computer you would like to upload. Click on Open.
- The file becomes then visible in the browser window and when it is the correct file, click on OK to upload the file to your workspace.
...
| Imagefloat | ||
|---|---|---|
| ||
|
| Imagefloat | ||
|---|---|---|
| ||
|
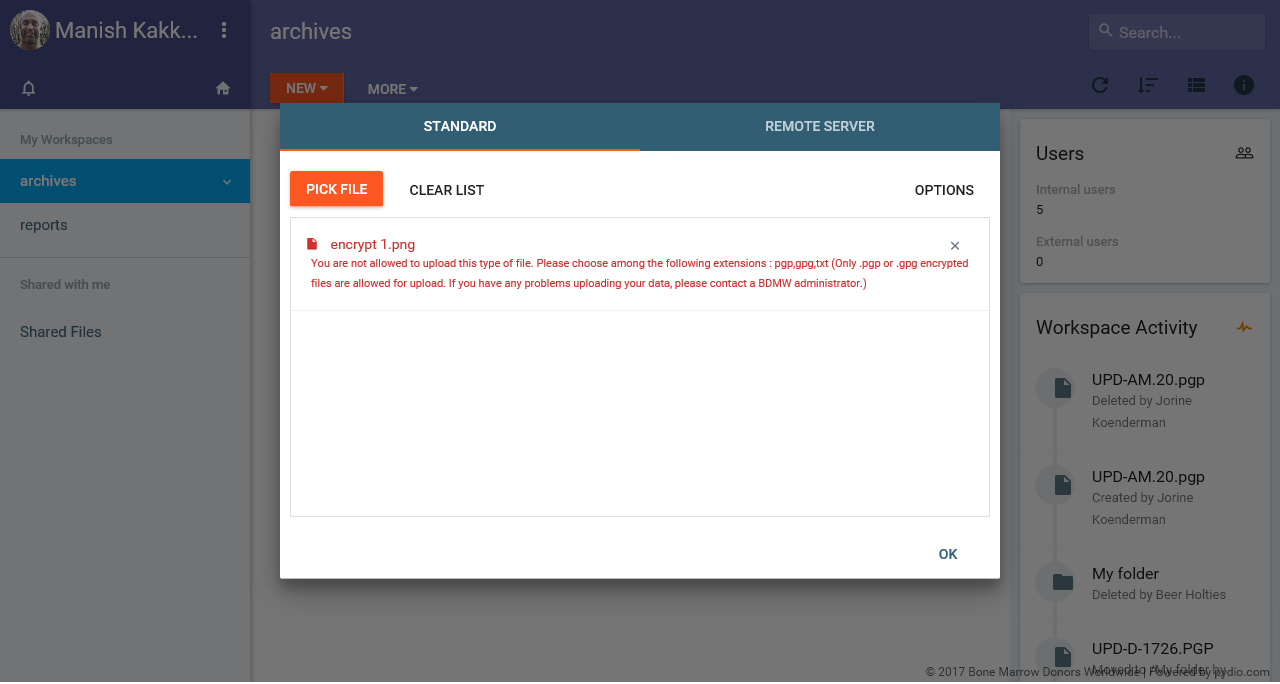
You are only allowed to upload files that are PgP encrypted. If you try and upload files that are non PgP the system will give you an upload error as shown in figure 8b.
| Imagefloat | ||
|---|---|---|
| ||
|
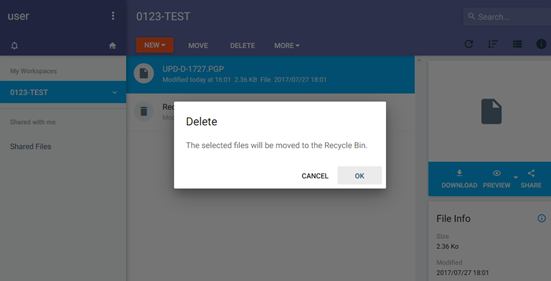
Manage/Update existing uploaded files
...
files
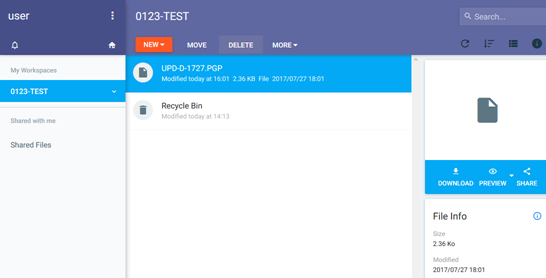
After uploading your file, you can still delete the file if it hasn't picked-up by the processing pipeline. Once the file is picked-up, you cannot delete the file anymore or cancel the processing. The system will check for new files every 10 minutes. Therefore, the time that you have left to delete the file can vary.
...
| Imagefloat | ||
|---|---|---|
| ||
|
Processing reports
...
PLEASE NOTE: Once the file has been added to the processing pipeline service the file will then move to the Archive folder. Files in the Archive folder cant be deleted. As a user you only have read/write access to your workspace. You only have read access to Archive and Reports folder.
Processing reports
Once the processing pipeline picked-up the file, it will start with all kind of validations and checksinitial validations in a sequence. The sequence is: Decrypting the file > XML file structure validation > Data content validation > HLA validation. Only once all of these validations have been completed will the system provide registry users a notification and a report that will indicate the outcome of the file processing. Processing messages are generated and stored in a file in your reports folder. All messages are collected in one file for each file you uploaded to the system.
...