...
- sandbox: https://sandbox-datamanager.wmda.info : here organisations can upload their data for testing purposes and check their dataquality, before moving to production.
- production: https://datamanager.wmda.info : here production data is uploaded, which is permitted only after QA inspection by WMDA.
Setup MFA
...
to get access for Data Manager
Setup MFA for the first time
Please follow steps below if you have not setup MFA with any other WMDA services like Search & Match or SPEAR:
- After you get permission to list data in WMDA Data Manager service, please contact support team at support@wmda.info to add you in our CRM system, mention it clearly you want to get access for Data Manager web application.
- After you are added in our system, normally after 30 mins, you will get a Welcome email, follow steps inside to setup the MFA. For your convenience, we also added the steps below:
- Click on the following link: WMDA Service password reset
- Confirm your e-mail address and set your password
- When you are done with setting up your password go to: https://portal.wmda.info/
- Click on “Partner Sign in” in top right corner
- Enter your email address as username
- Enter the password you set up earlier
- Click “sign in”
- Follow the steps to add this account to your authentication app on your mobile device
- Once complete, confirm that your MFA credentials allows you access to https://datamanager.wmda.info/
To access the system
Troubleshooting MFA
When you setup your MFA, or after your MFA is setup successfully, you may encounter issues use MFA properly. If that is the case, go to the WMDA MFA troubleshooting guide to check whether your issue can be fixed.
Manage and transfer MFA
After your MFA is correctly setup and you want to change to a new device, then you can do it easily by following steps below:
- Login your Data Manager service. Follow guide below to access the service.
- Click on the dropdown arrow next to your name on the top left side.
- Select "Manage and transfer my MFA". (Figure 1)
- You will be direct to a page where you can manger your MFA method. Further follow the detail guide How to manager your MFA.
| Imagefloat | ||
|---|---|---|
| ||
To access the system
- You successfully setup your MFA.
- To access the sandbox system to test your files, please go to https:/
- You successfully setup your MFA.
- To access the sandbox system to test your files, please go to https://sanbox-datamanager.wmda.info/. To access the production system, please got to https://datamanager.wmda.info/. You will see the Login screen as in Figure 1.
- If you are a normal (B2C) user, click on the Login button in Figure 12. If you are a B2B user, please follow the user guide here to login.
- Follow the steps for MFA to log in Data Manager web application.
- After login, the system defaults to your personalized Workspace, where you will find your organisation Workspace and all the folders you need.
| Imagefloat | ||
|---|---|---|
| ||
...
If you have access to only one ION, then you will be redirect to your Workspace folders directly as show in Figure 23.
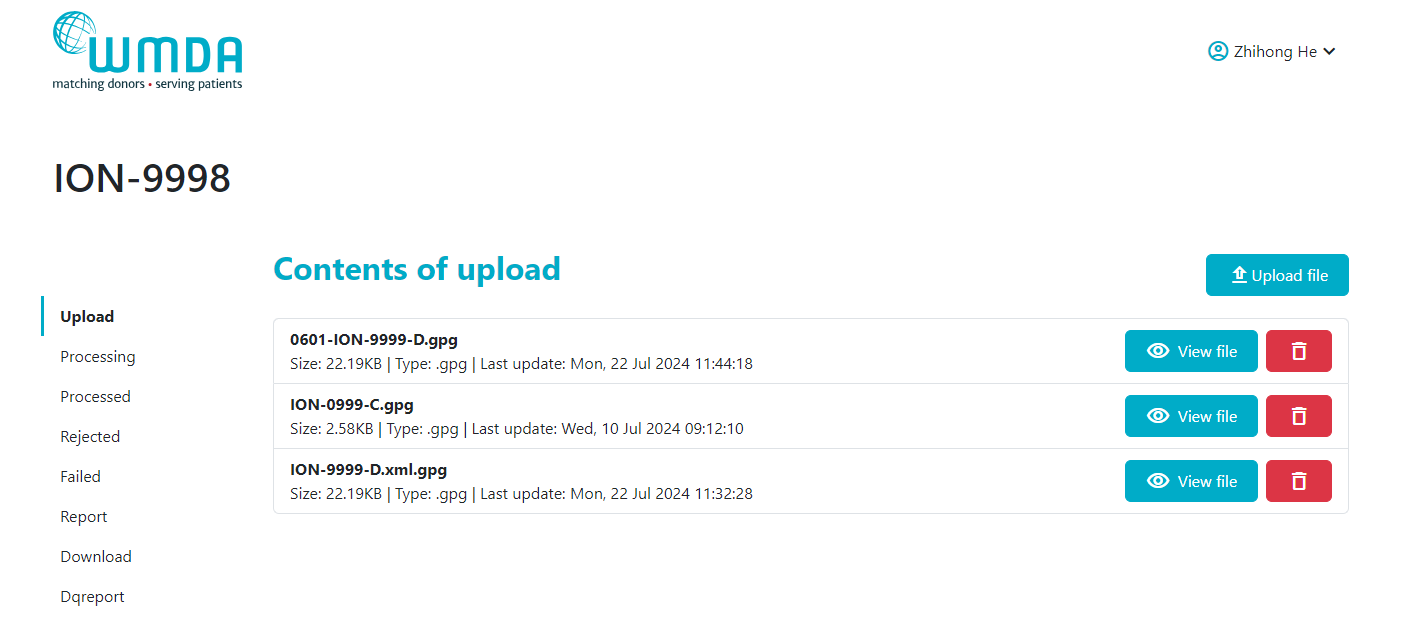
In Figure 2, it shows the example of the workspace for ION-9998, and all the folders user have access to. We will give more guidance to use this Workspace page below.
| Imagefloat | ||
|---|---|---|
| ||
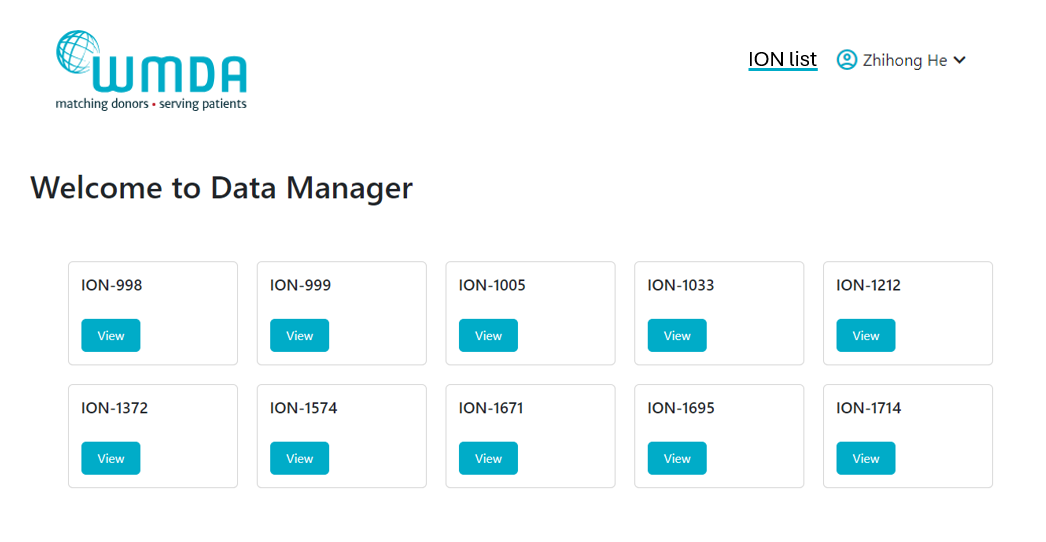
If you have access to multiple IONs, then you will be redirected to a web page with the list of ION as show in Figure 34. You can click button to go into workspace for each ION. And you can click on the tab "ION List" to be back to the ION list page. Statistic information for each ION will be added for user to monitor the activities in the future.
| Imagefloat | ||
|---|---|---|
| ||
...
When you login for the first time, the Workspace will be empty for each folder (Figure 45). You will see folders: Upload, processing, Processed, Rejected, Failed, Report Dqreport.
| Imagefloat | ||
|---|---|---|
| ||
|
...
- Click on the Upload folder of your organisation/correct ION.
- Within the Upload folder click on icon "Upload file" at right upper corner in the file list area. And a window to guide to upload a file will pop-up. (Figure 5).
- Option to select a file:
1). Click on button "Pick file" and a browser window will open and you can select the file on your computer.
2). You can also select a file by dragging and dropping the file in the proper area. - After a file is selected, then the selected file will be listed, and the "Upload" button will become available. (Figure 67)
- Confirm the file selected is the correct file based on the name.
- Click on button Upload.
- The file then uploaded and becomes visible in the file list area in the Upload folder. If the file is big, it may take some time to upload.
PLEASE NOTE: You are only allowed to upload files that are encrypted. If you try and upload files that are non PGP/GPG encrypted, the system will give you an upload error. (Figure 78)
After a file is uploaded completed to the Upload folder, then it can be picked up. After the An alternative method to upload your file to your Workspace is by dragging your file from your desktop to the main middle pane of your Workspace
...
PLEASE NOTE: The time to upload your file to the system depends on the file size and your internet upload speed.
| Imagefloat | ||
|---|---|---|
| ||
| Imagefloat | ||
|---|---|---|
| ||
| Imagefloat | ||
|---|---|---|
| ||
TBA as the service has issue to give the error |
...
- Within your Workspace go to the Upload folder, go to the file you wish to update/delete and click on the 'Delete' button at the end of the file (Figure 89).
- The system will warn you to ensure if you really want to delete this file (Figure 910).
- If you click OK, the file is deleted and will no longer be processed.
PLEASE NOTE: Once the file has been added to the processing pipeline service the file will then be moved to the Processing folder. As a user you only have read access to all other folders except Upload folder.
| Imagefloat | ||
|---|---|---|
| ||
|
| Imagefloat | ||
|---|---|---|
| ||
|
...
To close and exit, click on the dropdown arrow next to your name on the top left side (Figure 1011). This should give you a drop-down menu with 'Logout'. Click on 'Logout' and you will be get a pop-up window to pick an account to logout (Figure 1112). If you have multiple accounts listed here, please select the correct one. And after that you will see a notification window to mention you now safely logout.
| Imagefloat | ||
|---|---|---|
| ||
| Imagefloat | ||
|---|---|---|
| ||
Manage and transfer MFA
...
Processing report messages
...


