Version 2.5
Introduction
The Search & Match Service of WMDA is a web based software application that is accessible through the internet. This service offers authorized users a single comprehensive application that can be used to search and provide matches for donors/cords. If you would like to know more about the Search & Match Service you can watch this video
About this document
This document is designed to act as a reference guide covering the most important aspects of the Search & Match Service.
Content
The chapters in this guide roughly follow the sequence of the business process. Note that the instructions provided in most sections of this document assume as a starting point that you have logged into the Search & Match Service as a user with appropriate access privileges.
NOTE: Although every care has been taken to ensure the accuracy of this guide, there may be a few areas where there are functional or cosmetic differences between the current version of the user guide and that of the software. Therefore, we ask that users apply their intuition and common sense. Please kindly notify the WMDA office of any information that may be missing from the user guide, and any major discrepancies. We will make every effort to promptly update the user guide as further refinements are made to the software.
Bearing that in mind, we are sure that you will find a wealth of valuable information in this user guide to assist your daily use of the software along with the necessary understanding of the basic concepts.
Further Sources of Help
This guide aims to help users of the Search & Match Service to effectively perform specific aspects of the process and to manage record information. If you encounter any technical difficulties in using the system and cannot resolve them by reference to this user guide, please contact the WMDA office at support@wmda.info.
Data Handling Procedures
Users of the Search & Match Service must comply with the data security and handling requirements. Once you extract data from the system, you are responsible for its security in accordance with your national legislation and your local department data handling policies and procedures.
Generic Principles
This user guide provides you with instructions on how to use the Search & Match Service. It is designed to assist you with searching for donors or cords and provide you the best potential match to your patient.
Important information:
- The Search & Match Service uses the OptiMatch matching algorithm that helps to provide probability matching using haplotype frequencies. For more information about haplotype frequencies, visit this web page.
- The Search & Match Service uses asynchronous matching, meaning that your searches will keep running even when you are using other features in the system or after you have logged out.
- The Search & Match Service is browser agnostic, therefore it has been programmed and optimised for use with the latest versions of a few browsers like Mozilla Firefox, IE 7 and above, Safari and Google Chrome. The Search & Match Service is also compatible with laptops, PCs, tablets and partially with mobile devices.
- As the Search & Match Service is a web-based application, it may be subject to delays depending on the speed of the internet connection and server load. If you are not able to access the login screen of the application, please check that your internet connection is in proper working order.
- In certain instances, if you close your browser, the browser window or the tab in which the Search & Match Service is running, new entries or modified data will be lost unless you have click Save or Update beforehand. It is therefore essential to save data after every change is made!
- WMDA collects the data from donors and cords on behalf of the listing organisations and OptiMatch is connected to this database to perform the probability matching algorithm.
- For technical reasons, only one instance of the application can be opened at a time. Therefore, it is not advisable to have multiple sessions open as this may also lead to inconsistencies between the different application windows.
- After 30 minutes of inactivity the application will close automatically. You will again see the login screen, and any unsaved data will be lost. Your searches will continue to run as part of the asynchronous matching feature.
- The Search & Match Service is secured using HTTPS. Because of this all communications between the web browser and server are encrypted, guaranteeing data privacy and security.
- Please always exit the application by clicking on the Logout button. You will then be logged off and the application will close.
- The Search & Match Service is accessible at all times unless it is unavailable as part of any upgrades or maintenance work.
- The Search & Match Service is only available in the English language.
- Cookies and Java Script need to be enabled to be able to use the Search & Match Service properly.
- Generally you should avoid using browser buttons such as < (”back one page”) or > (”forward one page”), as by going ”back one page” the previous action (saving, etc.) could be performed again.
- Next to some fields or functionalities you can find an
 icon with more explanation.
VERY IMPORTANT NOTICE about probability matching
The Search & Match Service performs probability matching by using either a haplotype frequency or allele frequency algorithm. Please keep in mind that probability matching will just calculate chances and you should use it as a tool in combination with your own knowledge of HLA. Do not select donors/cords solely on the probabilities calculated by the system. You can read more about haplotype frequencies here.
Getting started
Accessing the Search & Match Service
You can access the Search & Match Service via web address (or URL) by entering the address: https://searchmatchfesa.z6.web.core.windows.net/#/auth. You can save a bookmark in your browser, e.g. for the Search & Match Service, so that you are immediately directed to the login page.
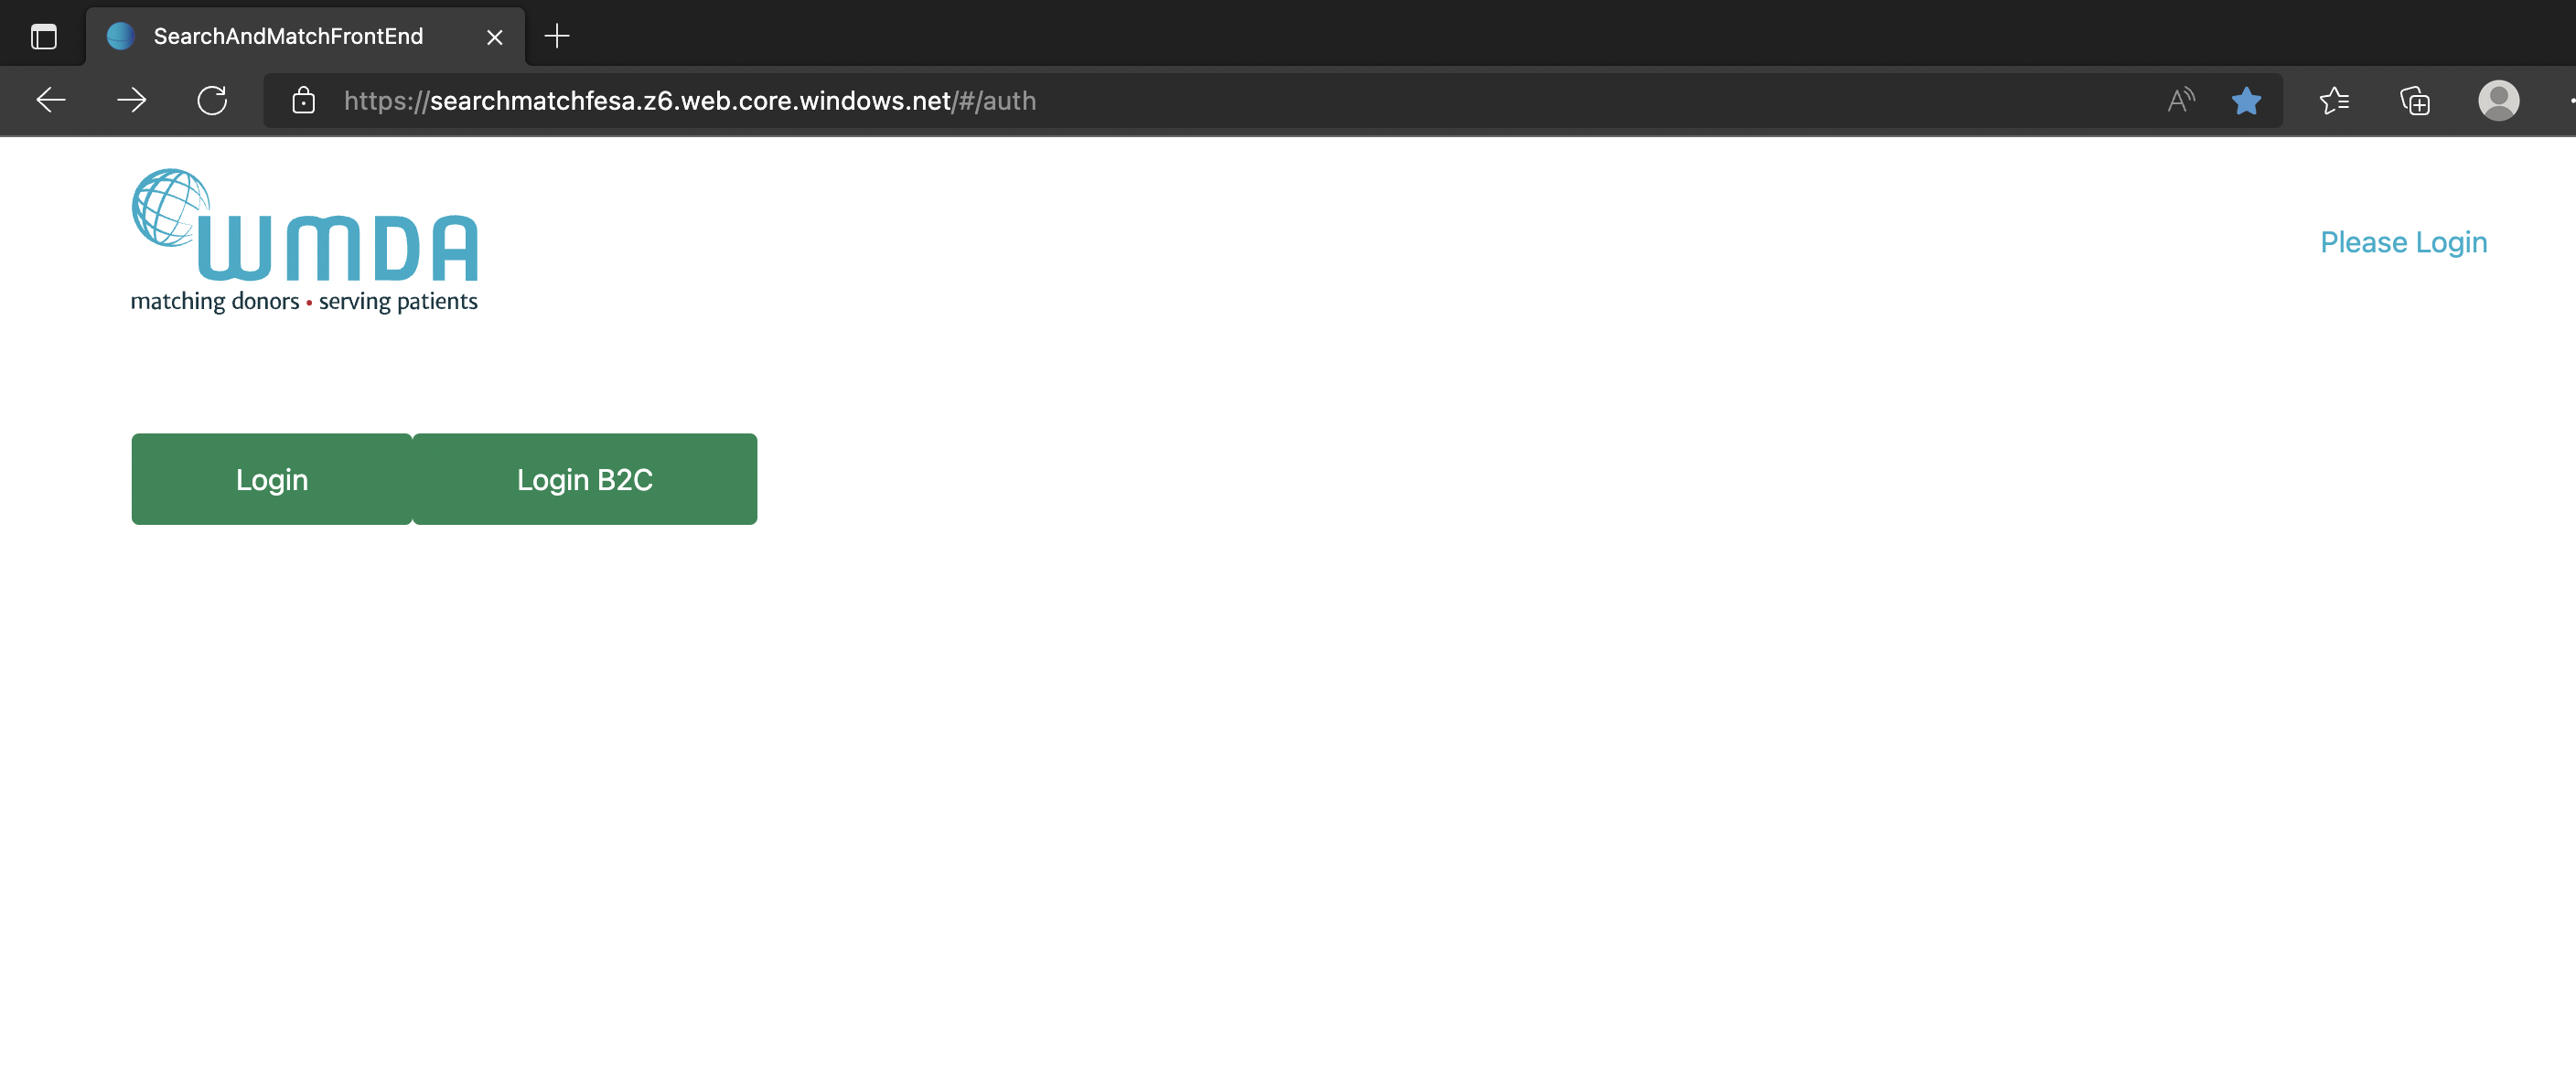
Figure 1: Login screen of the Search & Match Service.
Figure 2: Forgot Your Password page.
Figure 3: Reset password.
Return to the login page (figure 1) and login with your e-mail address and new password. The Search & Match Service ensures that the right credentials have been entered before granting access to the system. The system defaults to your personalised Search & Match Service homepage, where you will find your dashboard with information about searches and patients from you and your organisation. Furthermore, you will find some practical information, links to addresses of registries and cord blood banks and information about how to report feedback and problems.
Tip: If you haven’t changed your password for a long time, we recommend that you do so to ensure that your profile is secure. We recommend that you change your password every 6 months.
Logging off
To close and exit the application click on your name on the left of the site page and a Logout button will appear (figure 4), once clicked, it will take you to the log out screen. After logging out of the system, you will be redirected to the login screen.
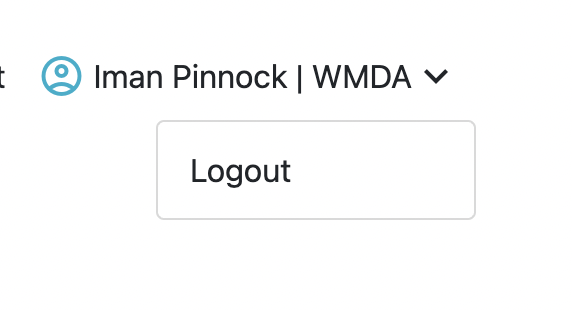
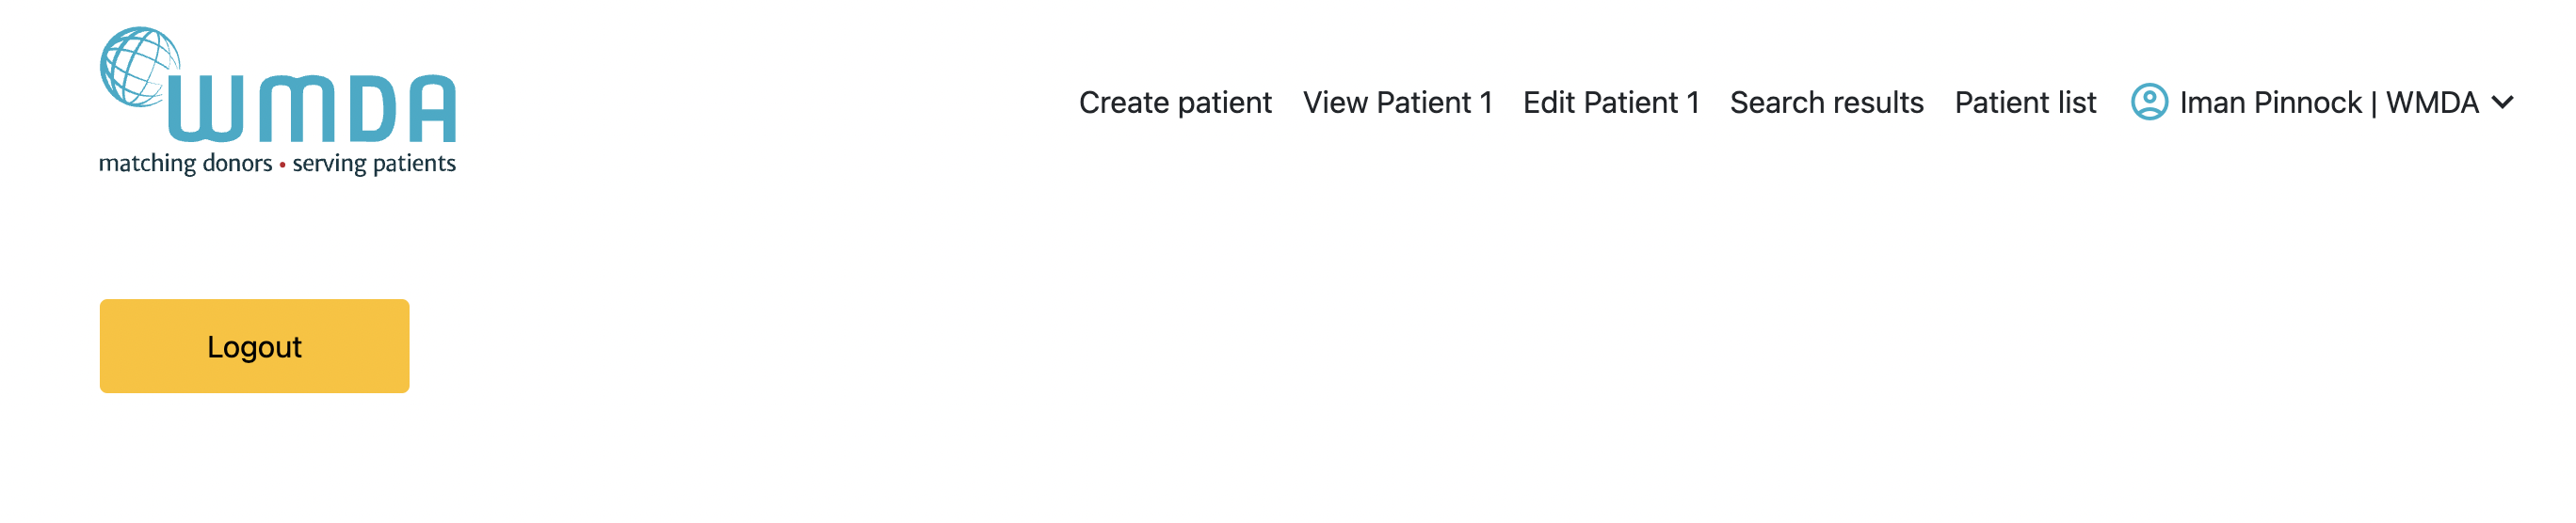
Figure 4: Logout
Note: Please do not simply close your browser; otherwise your unsaved data may be lost.
System Overview
Currently no footer
Figure 5: Navigation levels
Navigational Toolbar
The Navigational Tool bar is displayed across the top of the screen. This toolbar is also referred to as ribbon in some instances. This toolbar displays links that take you to the specific section you wish to view/manage.
Listed below are the links/buttons and a short description:
Button | Description |
Logo | No functionality. |
Create Patient | This opens a form that allows users to register the details for a new patient. |
| View Patient 1 | Allows the user to view the patients information. |
| Edit Patient 1 | Allows the user to edit/update the users information. |
Patient List | This section lists all active and inactive patients. Within this section users are allowed to manage their own or organisational patients. |
| Search Results | Display all the patients with match probability, hla values, etc. |
User name/profile | This section contains now only the logout functionality. |
Logout | This action will sign you off and return you to the login page. |
Home
Currently no home page
Figure 6: Personal homepage
Add patient, update patient, view patient
This section allows you to enter and register a patient that you wish to perform a donor/cord search for. You can register a patient manually or automatically through an API.
Register your patient manually
First click the "Create Patient" button. You will then receive a pop-up asking you whether the patient has consented to being entered on the list. When you do not have the patient's consent, please indicate this. You will then not be able to enter a patient ID or comments, but you will still be able to enter HLA and additional details and perform an anonymous search. The first form shown below in figure 7 is only used for entering new patient registrations, the second form is for updating existing patients. When entering data, make sure that the fields marked with a red asterisk (*) are completed as they are mandatory in order to perform a search. In some of the fields (CMV, blood group, ethnicity, diagnosis, gender) values can be selected from a pre-defined drop-down list.
The form is divided in 5 blocks: HLA details, medical details, search type, additional information, and legal terms.
The "update patient" form is accessed by clicking on a patient in the patient list.
It additionally shows the match results if you already have performed a match run. The button "Add patient and run match" is replaced by the button "update patient and re-run match". Furthermore, 2 extra buttons are visible: "Request Search Advisory" (for requesting advice on difficult searches from the WMDA HLA expert) and "Deactivate patient" (for moving a patient from the active patient list to the inactive patient list).
When entering a Patient, only the following fields are mandatory:
- Patient ID (ID assigned by your organisation; please do not enter patient's names). Only when indicated that you have the patient's consent.
- A valid HLA-A, -B, and -DRB1 phenotype
- Ethnicity to improve the operation of the Haplotype frequency algorithm (ethnicity is set to "Unknown UK" by default)
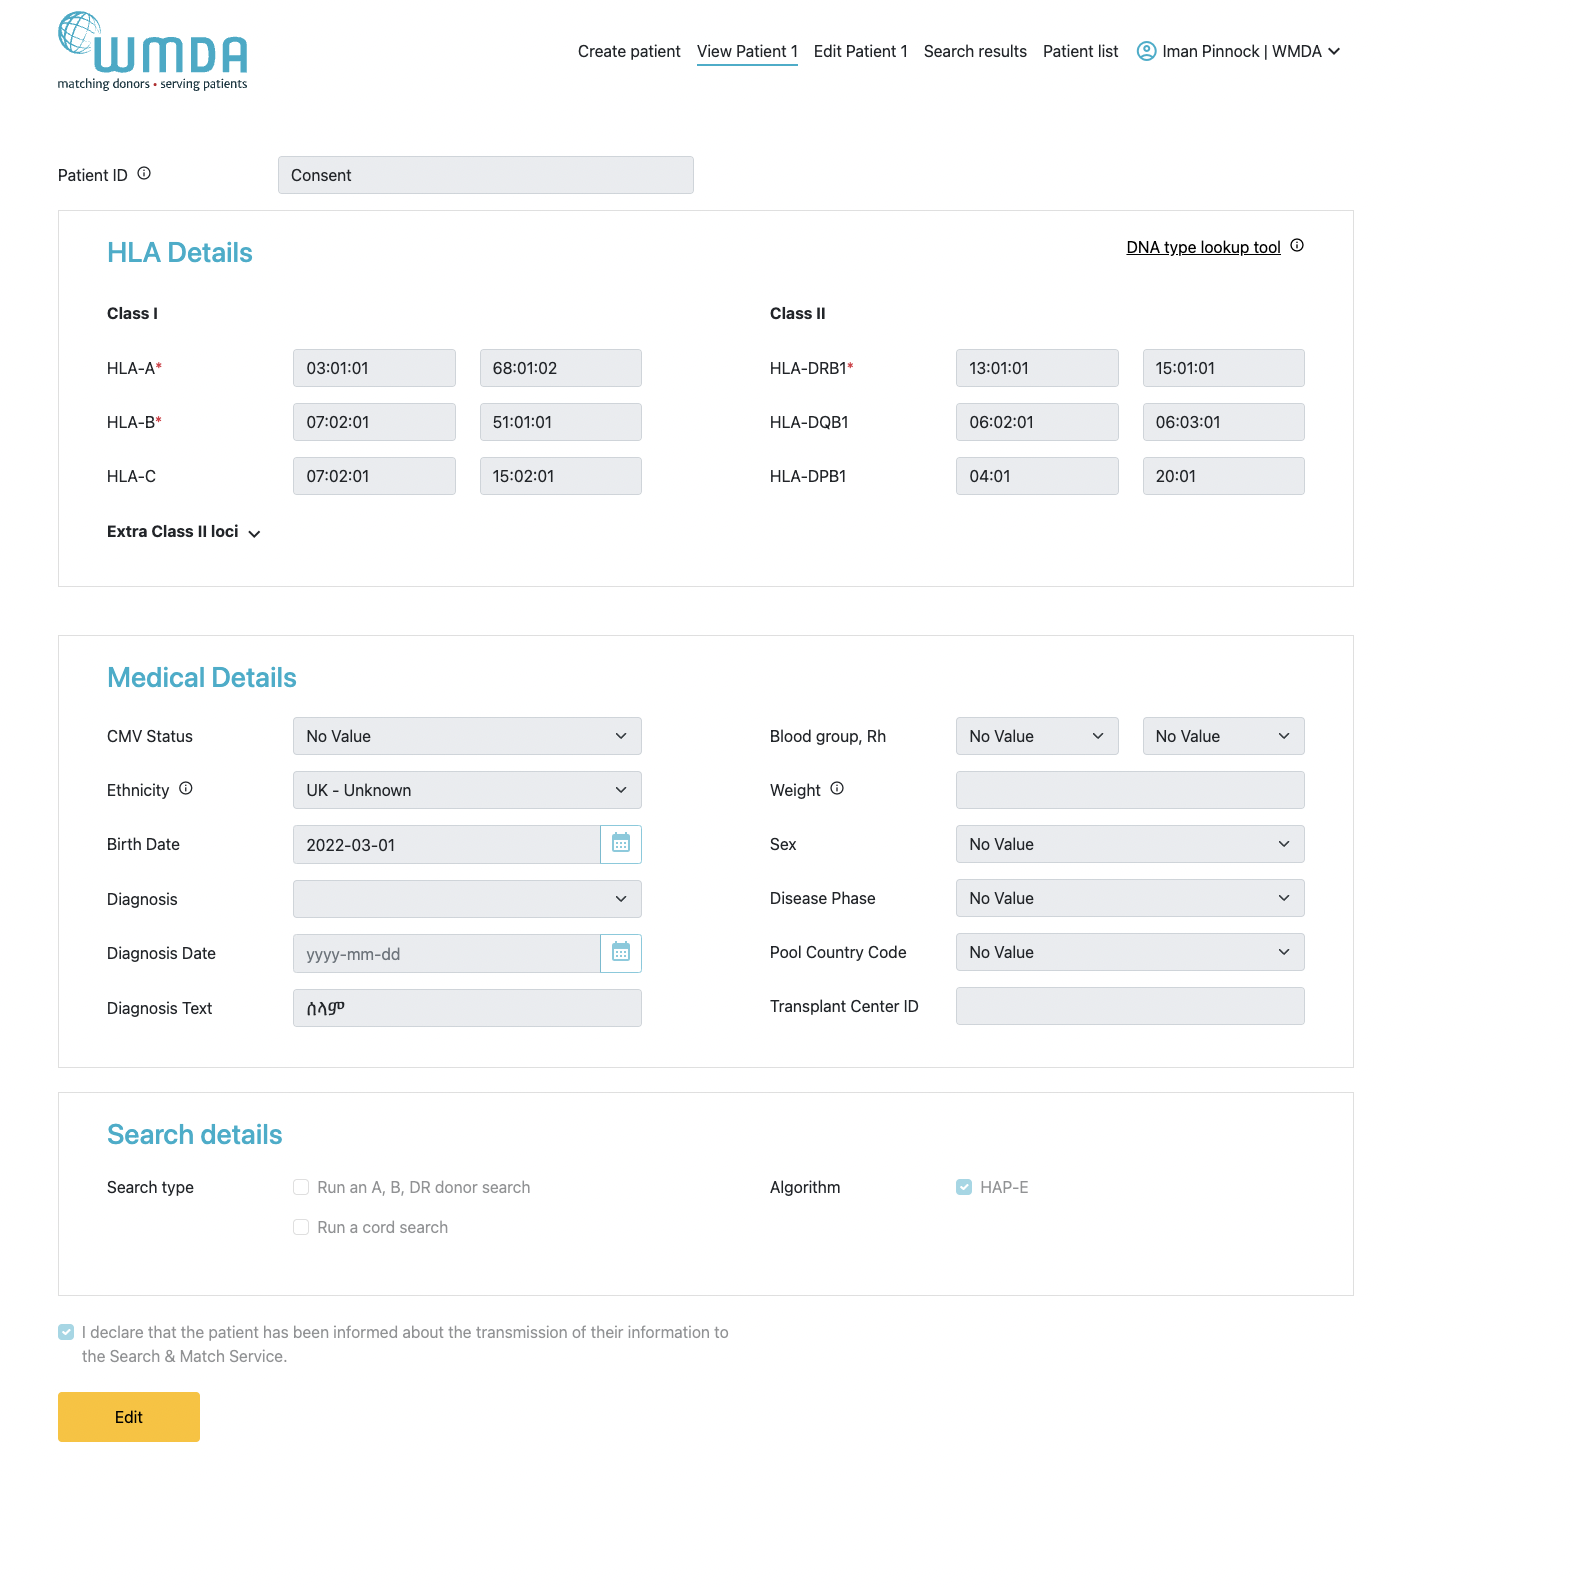
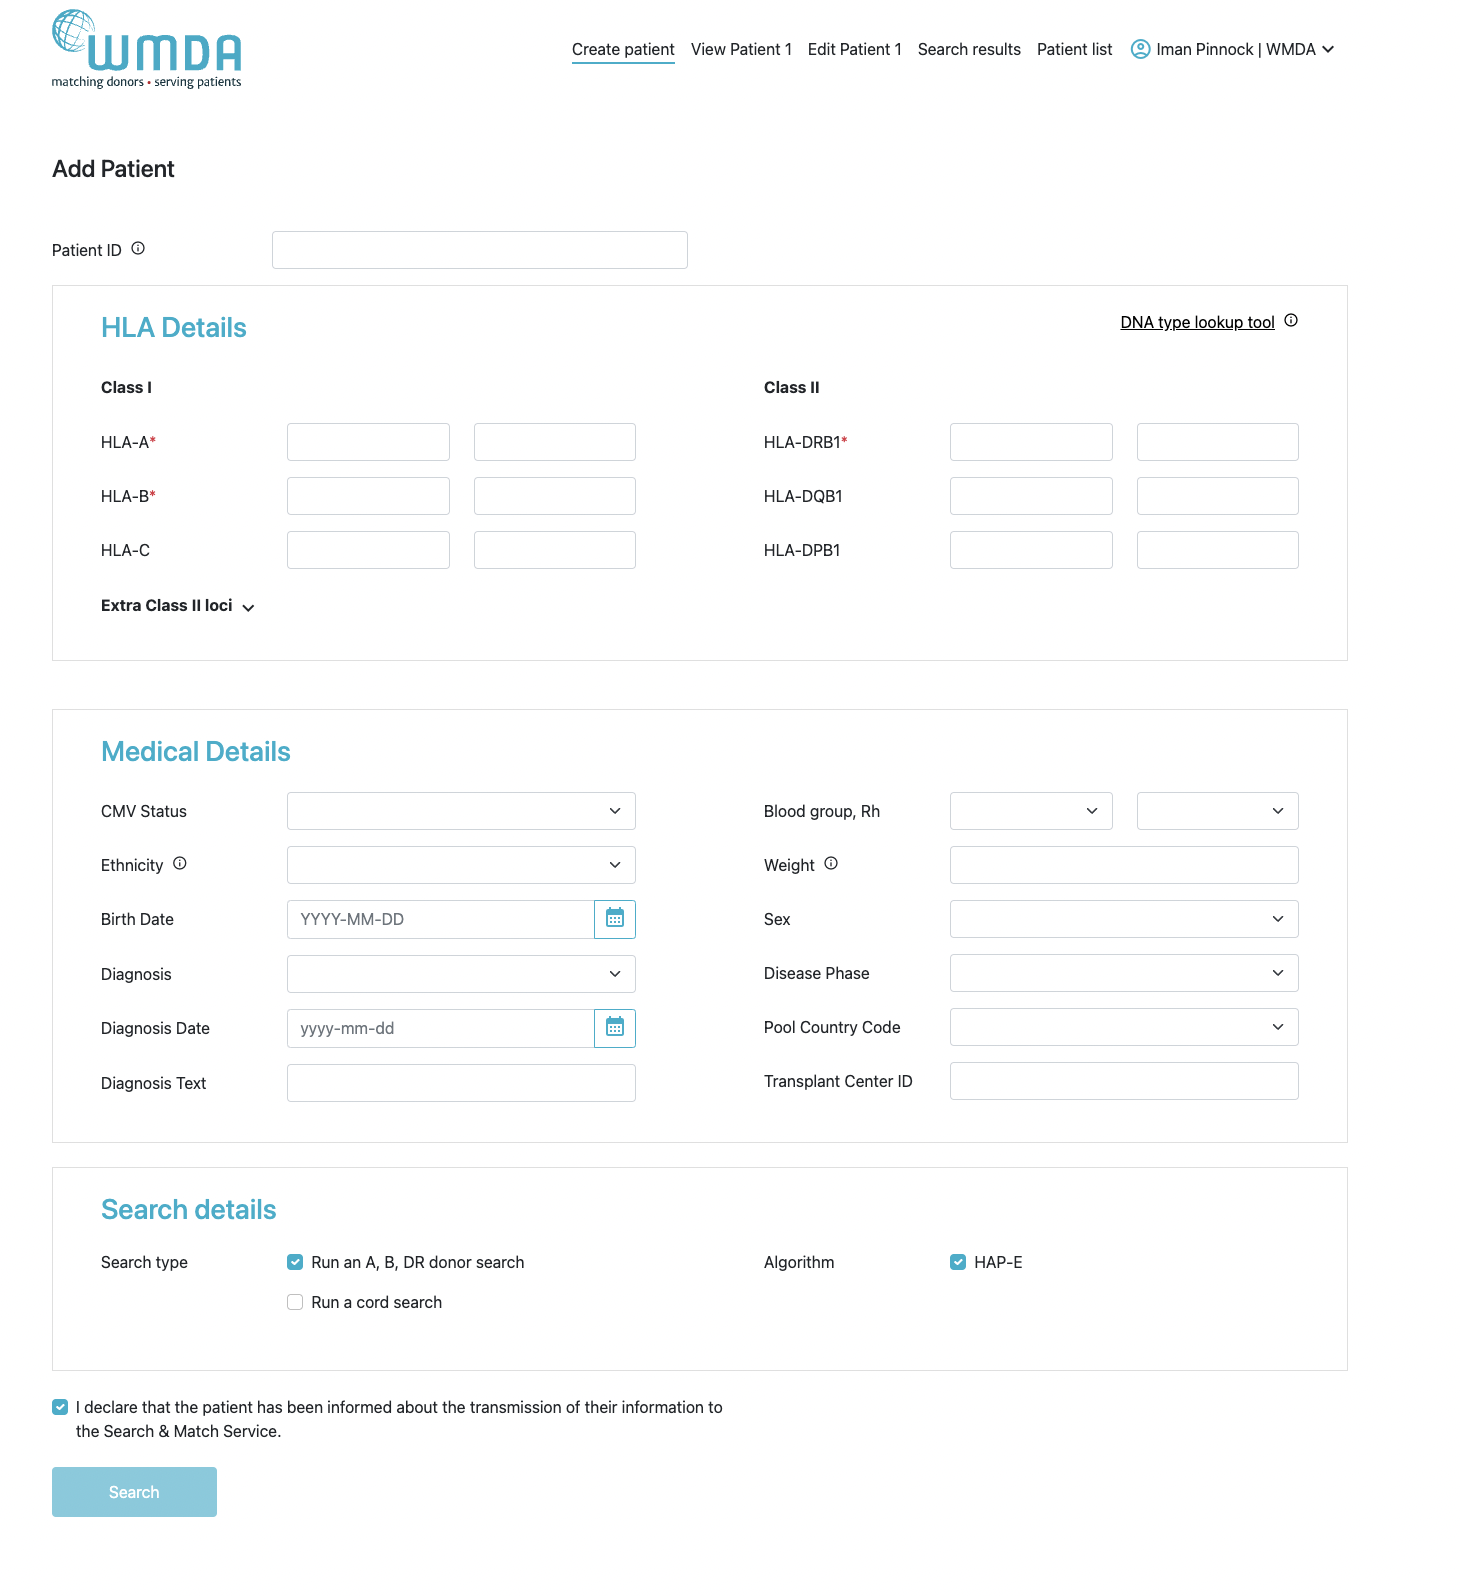
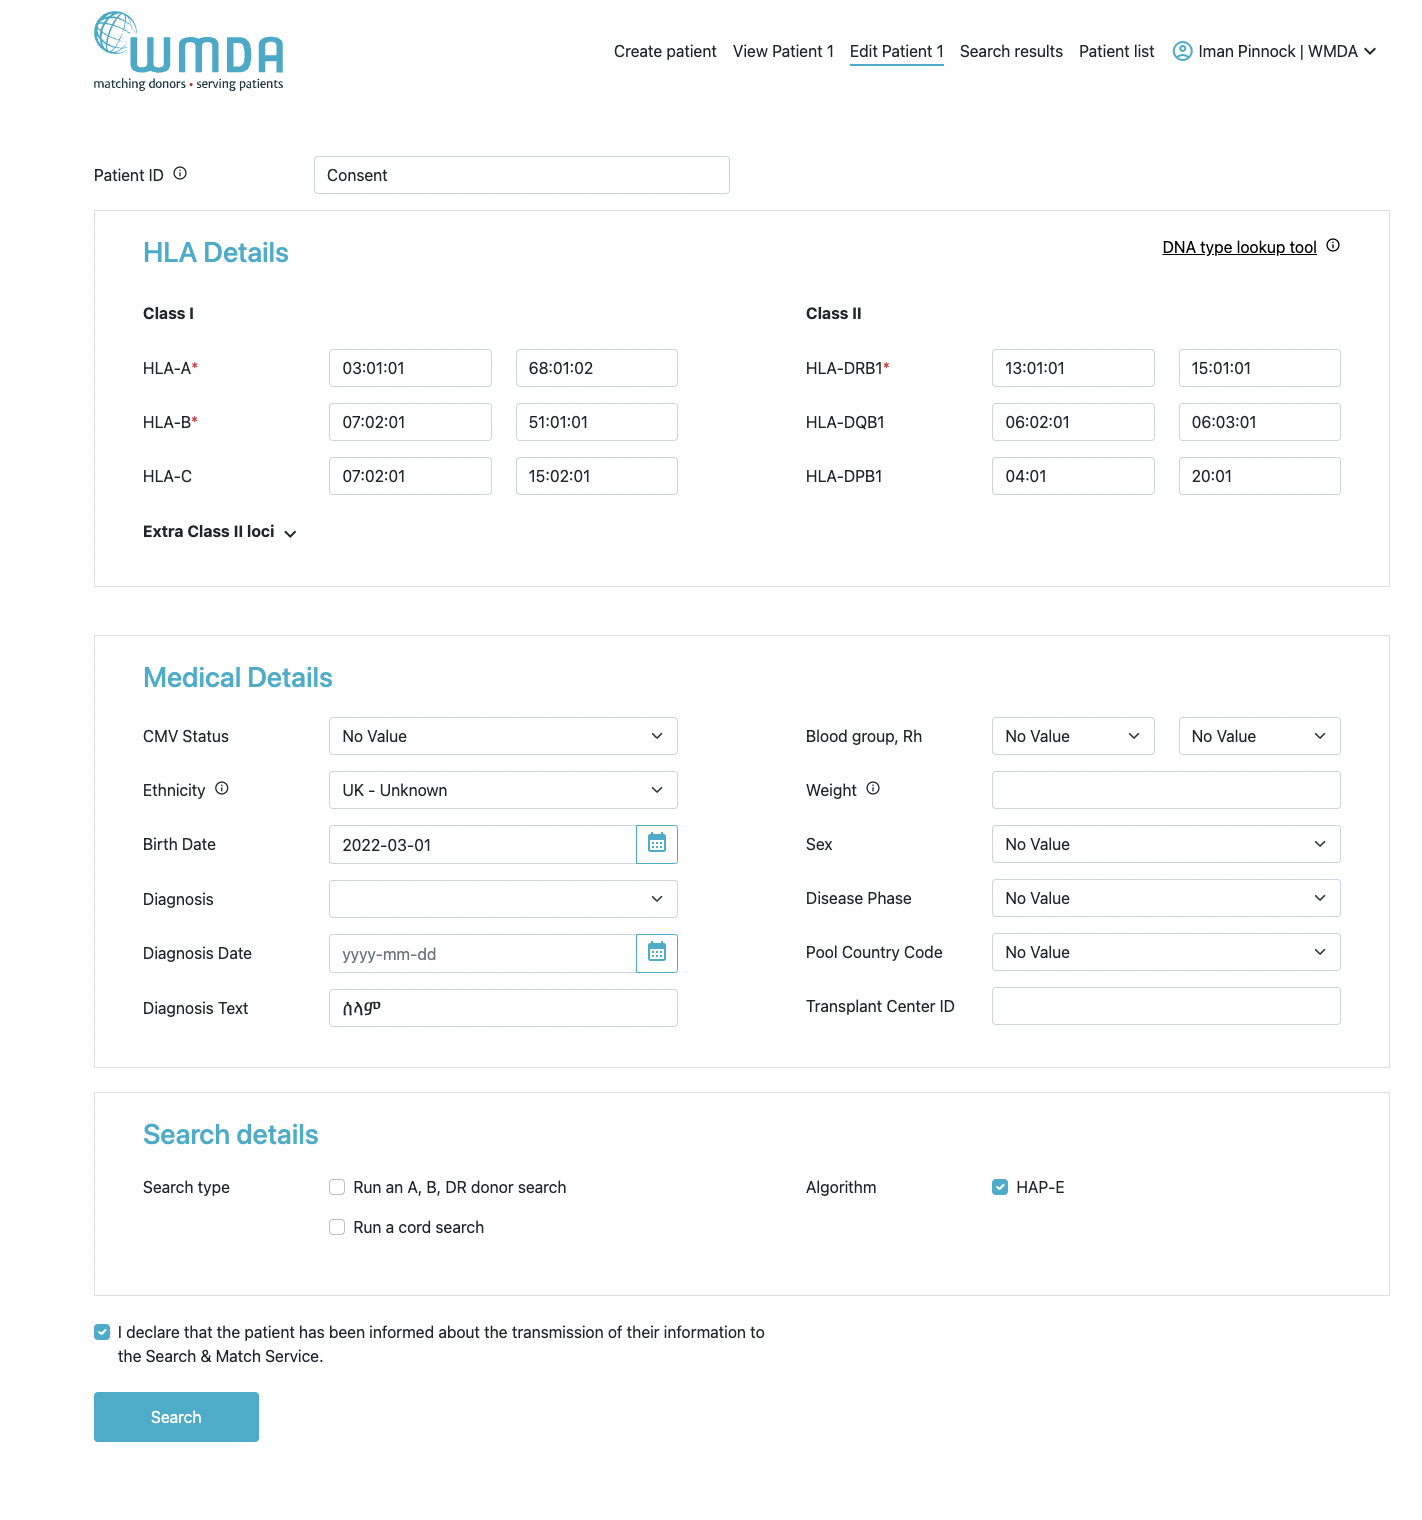
Figure 7: Add patient form, view patient for and update patient form
On saving a record, your entries will be checked immediately for plausibility and completeness. If a record is not plausible, an error or warning message will be displayed on the top of the page.
As part of capturing all of the patient details we recommended that you add all available additional data. You will benefit from these extra patient details when you are reviewing the additional details from donors/cords and you will be able to make a better judgement for your patient.
NOTE: It is now also possible to perform matching on only HLA-A + HLA-B. This option is only available in the add patient / update patient form in the box Search type. Please keep in mind that this match run will take more time to retrieve results and should only be performed if you have not retrieved valuable potential donors with the n/10, n/8, or n/6 match runs.
Other things to consider when entering patient details:
- The patient ID should be unique and the system will check for duplicates when you validate the data by clicking on the Add patient button. The patient ID cannot be changed when you update your patient (read only field).
- HLA should be entered with a colon (:) as separator.
- HLA strings can not be entered into the HLA fields; you can use the DNA Type Lookup Tool at the top right corner to lookup the corresponding NMDP code.
- Search determinants will be generated from the DNA values entered. The search determinants will be used for matching.
- Dates can be entered either by using the calendar or just by typing. When you enter the date manually, please ensure they conform to the ISO date format of YYYY-MM-DD which is also shown in light grey (mask) in the date fields. Date of birth can also be in the future.
- Use the tab key to move from field to field. When using the tab key on the HLA fields, the cursor will move as such that you can first enter both locus values, before moving to the next locus.
- After you are finished entering the patient's details, please click on the "Add patient and run match" button at the bottom of the page. This will trigger a validation of the entered data.
- If the system finds any issues they will be highlighted in RED at the top of the form stating the reasons for it not saving the data.
- If the system detects no problems, then the details entered are stored in the database and a match run is automatically triggered for the patient.
- For urgent recipients, the 'Urgent' checkbox can be set. This checkbox does not affect the speed of the match functionality, but may be used to manage the list of patients described in the previous section.
- Default, the system will start to run a 10/10 matched donor search. If you only want to register your patient, make sure that both check boxes for donor and cord search are set to no in the section search type. This prevents the triggering of a search
- If you did not enter HLA from your patient for all 5 loci; A, B, C, DRB1, DQB1, the system will not perform a 10/10 match run, but will downscale the match run to either 8/8 or 6/6 depending on the amount of HLA loci available from your patient.
Patient List
Within each category you can view a list of your own patients or a list of all patients from your organisation:
- Active patients
- Inactive patients
They each show a number in brackets representing the total number of patients in the corresponding list.
Figure 8 shows the patient list page of active and inactive patients, and the screen which is displayed once a patient has been selected and clicked on.
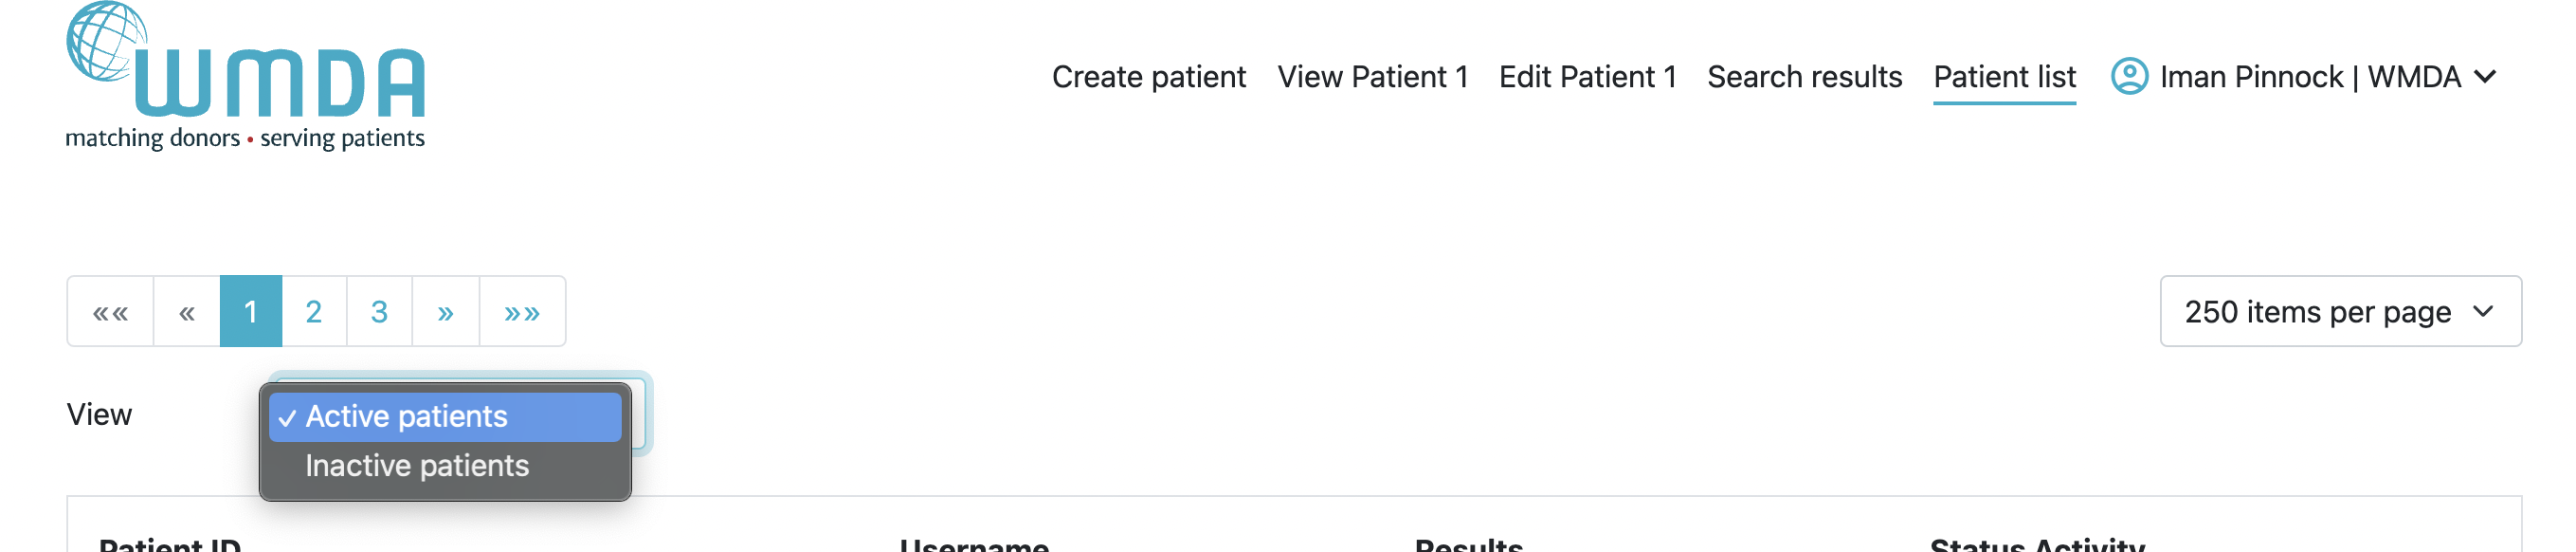
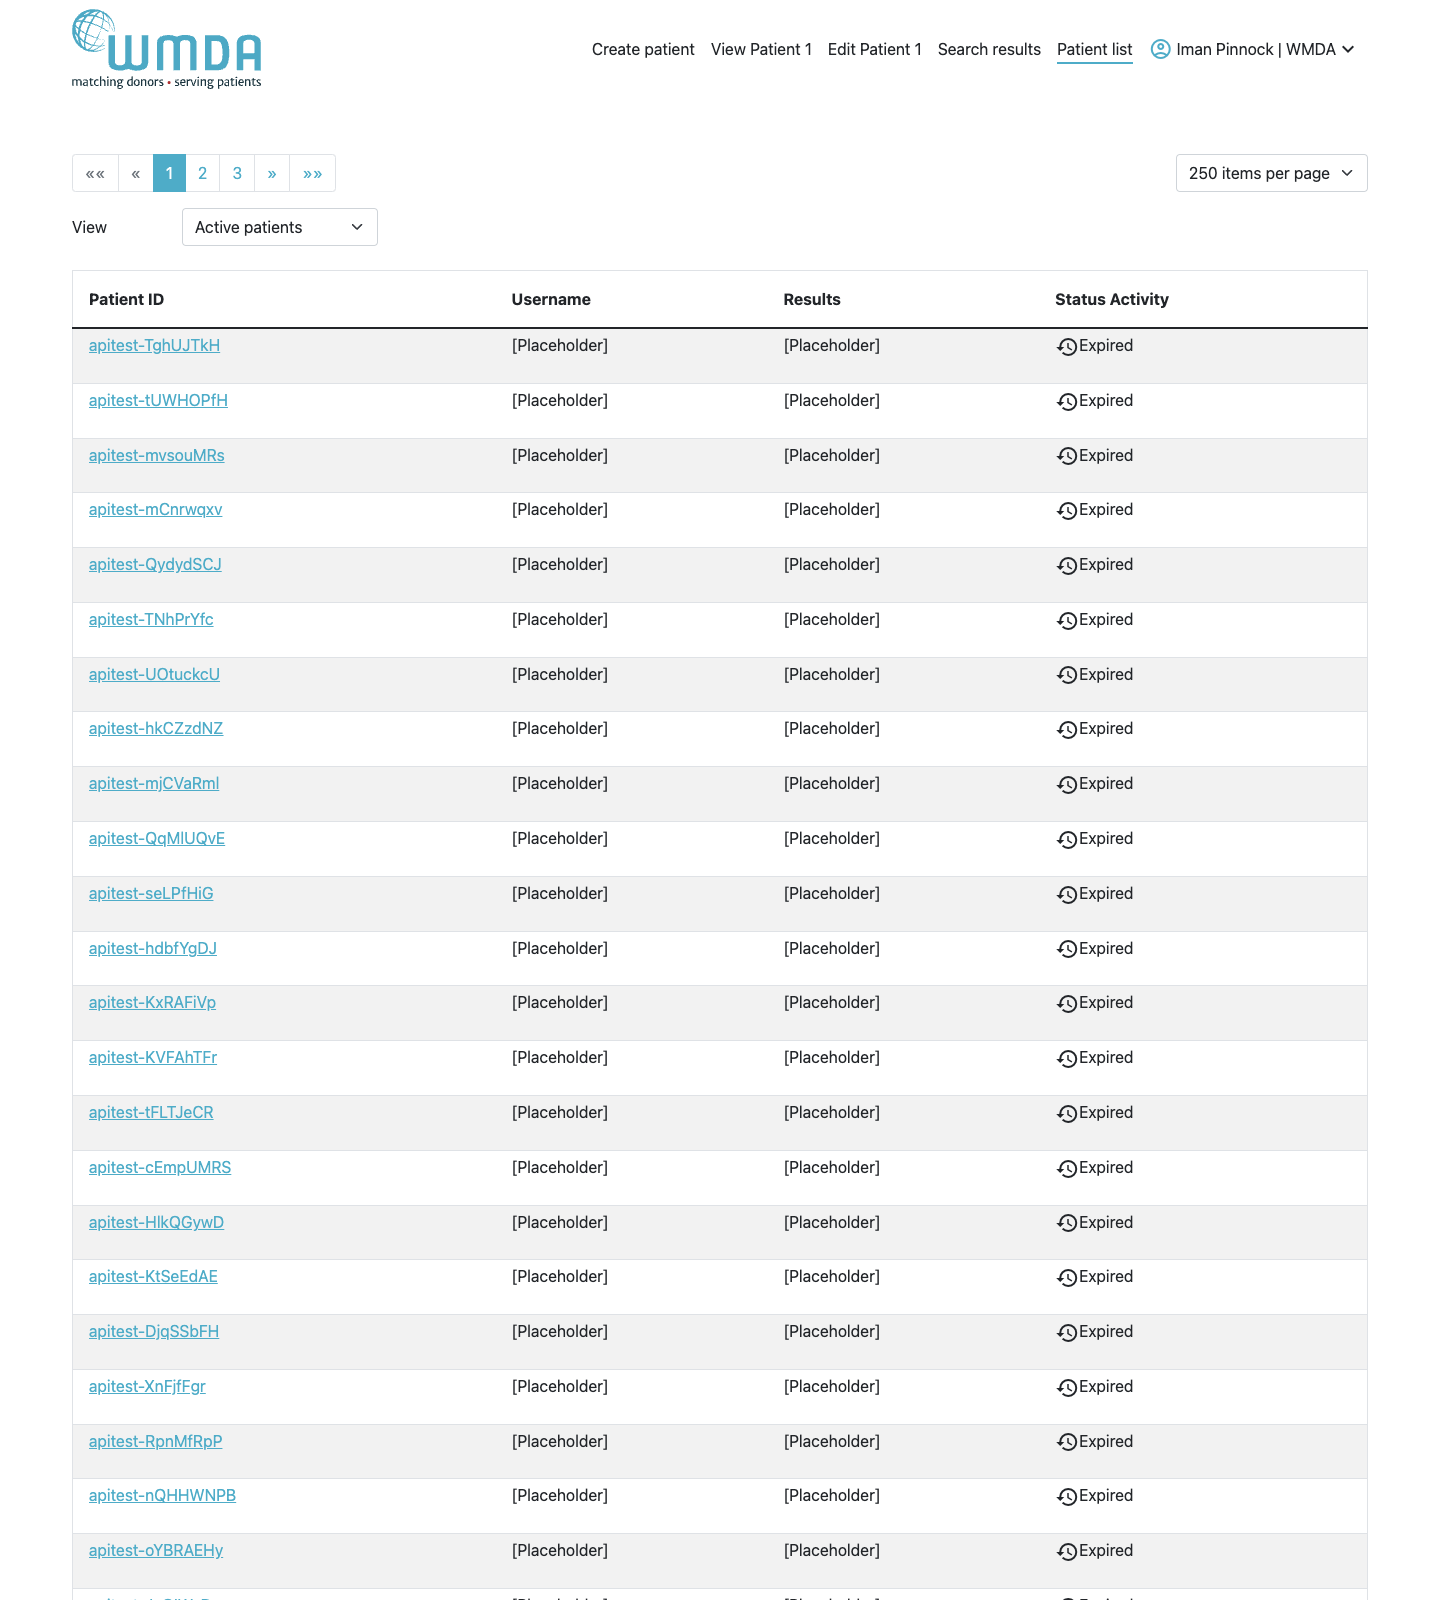
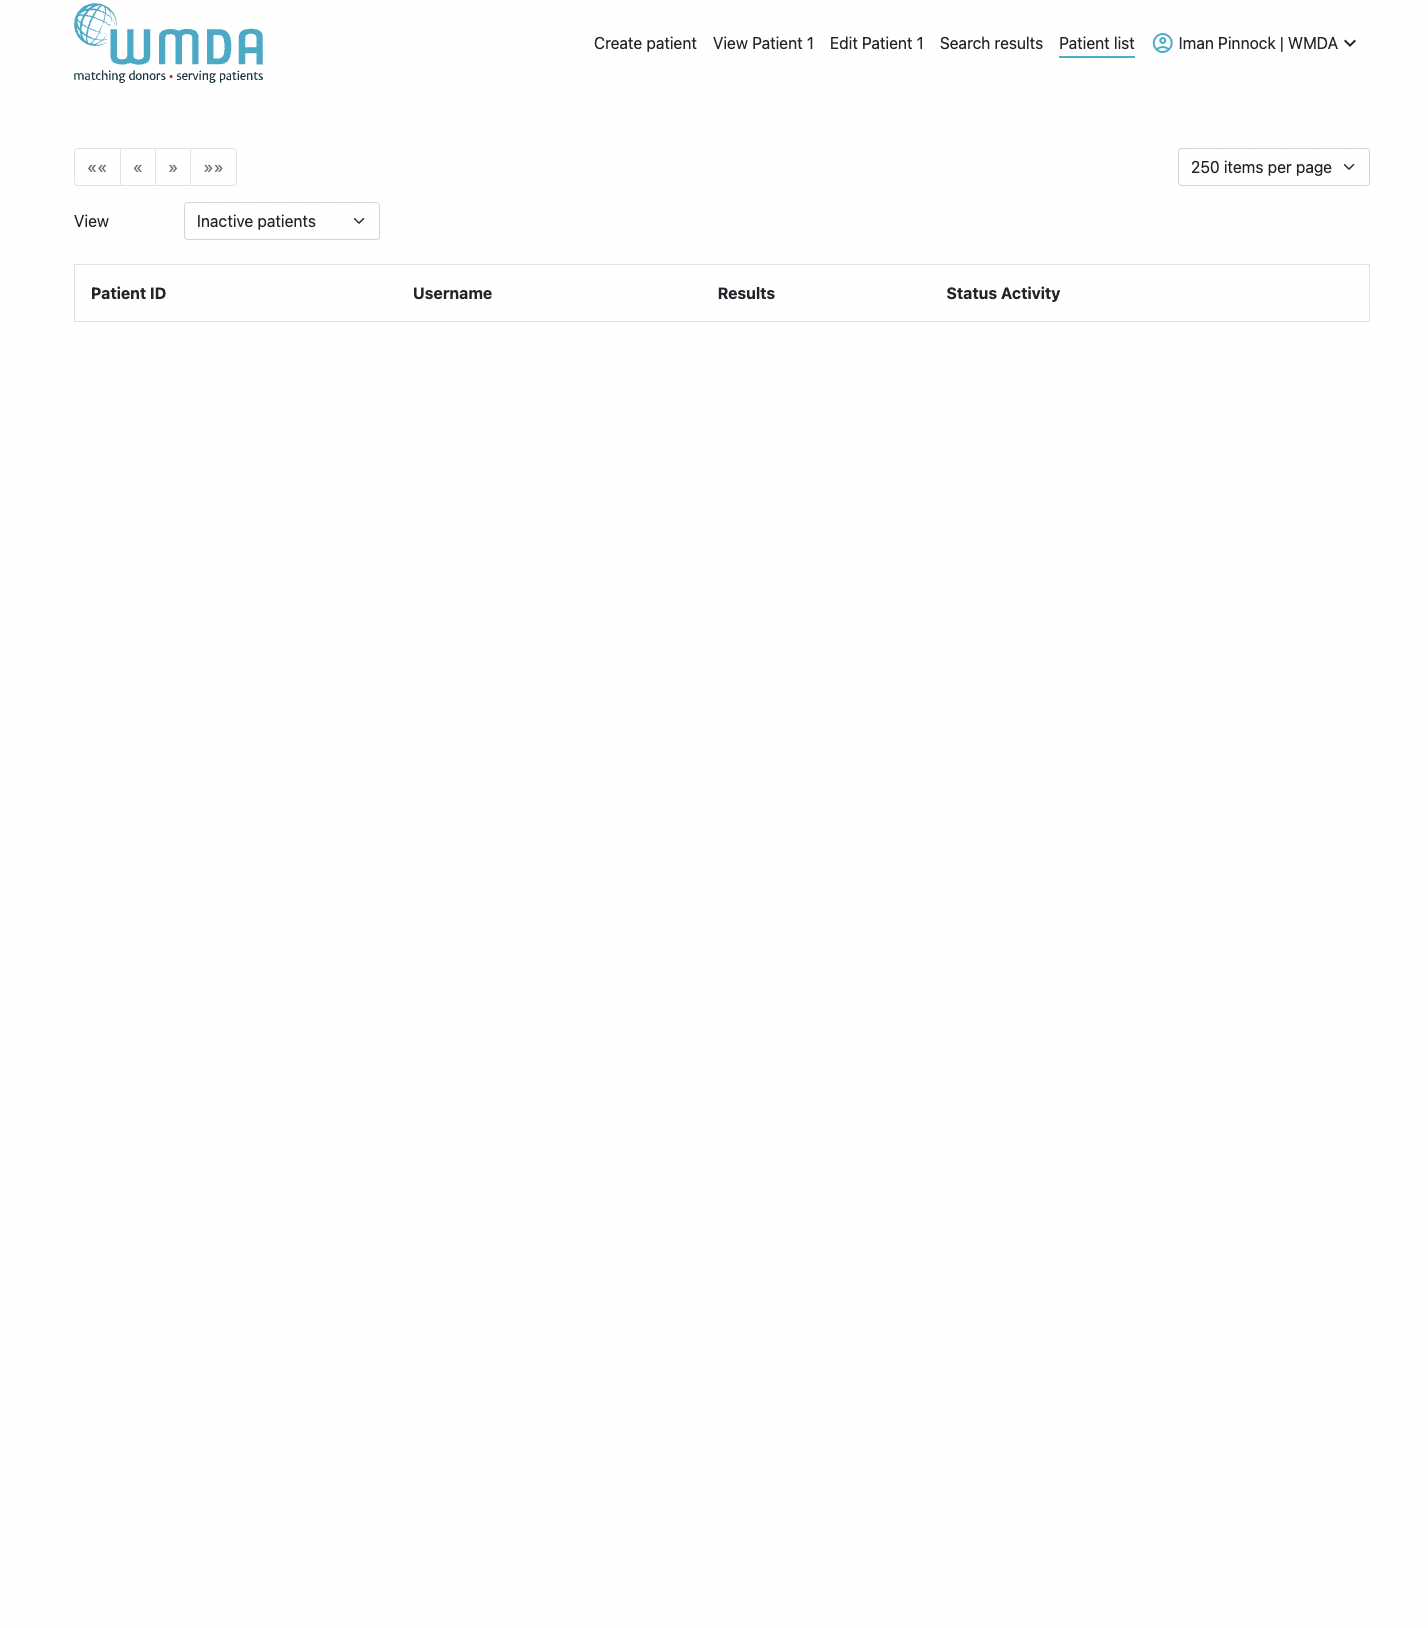
Figure 8: Patient list; active and inactive
Within the patient list you can perform various other functions listed below:
Actions | Description |
Sorting using column headings | If you have a large number of patients, you can sort them using the following column headings: Active patients (second row, left side). Inactive patients (second row, right side). |
Within the table of listed Active patients you can manage your patients by performing the following actions listed below:
Actions | Description |
Patient ID Link | Clicking on the Patient ID link will open the update patient form to allow users to perform the following functions:
Edit/Update patient details: Modify any details for the given patient, except the Patient ID.
PLEASE NOTE: Update of any of the patients details such as HLA, will automatically trigger a new match run. This might change previous search results. Only if you remove all ticks in the search type block, no new match run is triggered, but any previous search results will be lost as well. |

Search results
Once the match process is completed, the number of matched donors/cords and short summary of the search will be presented in the column "Results" from the patient list. This link redirects you to the search results details. When a user clicks on the search results they are presented with a search results page consisting of the following parts:
- Patient details
- Match results for (patient ID)
- G/P-Code information
- NMDP Code information
By default, only the boxes with the summary of results and the match results are expanded; the other boxes are all collapsed (Figure 12).
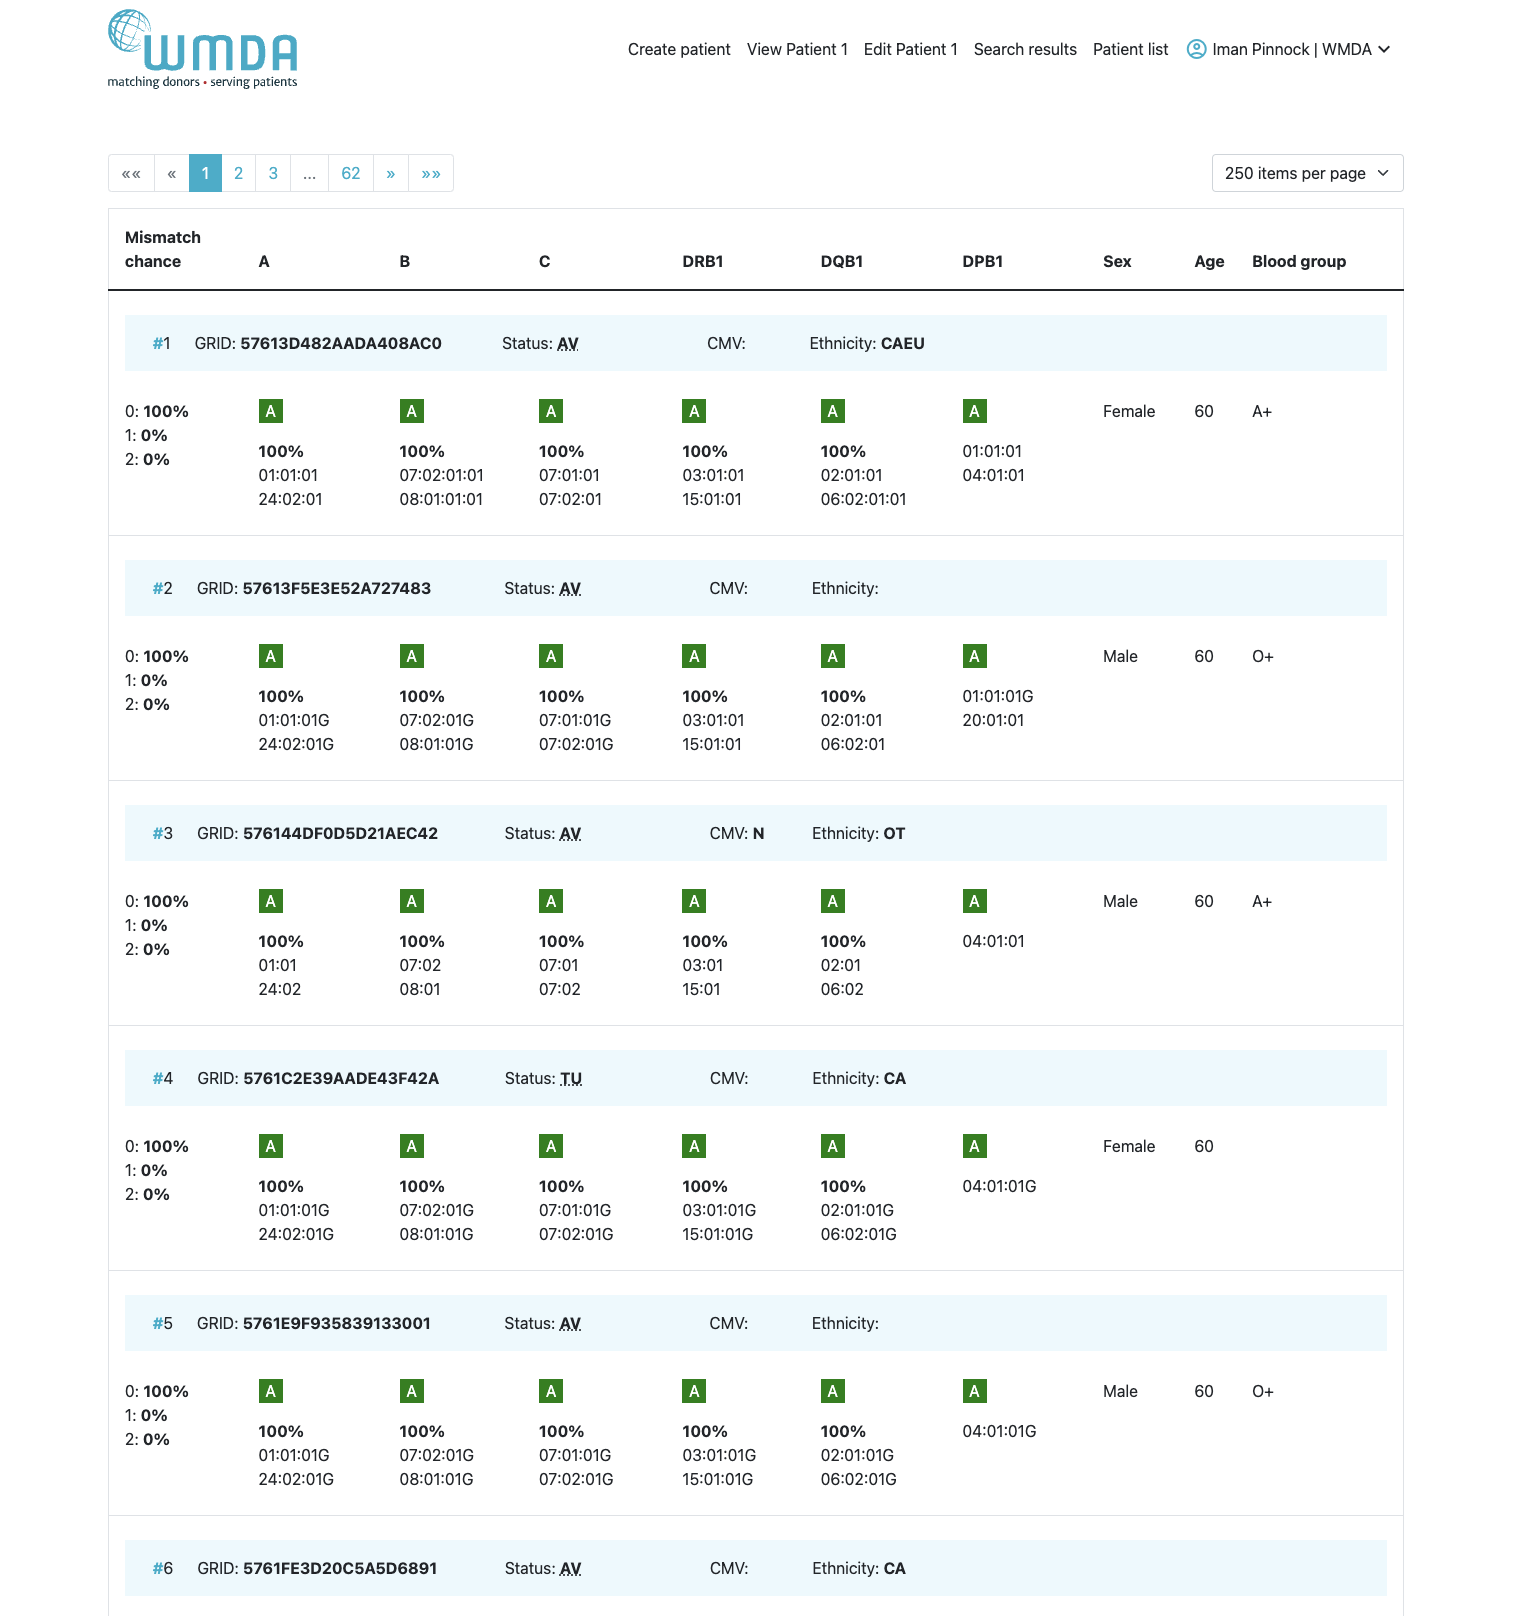
Figure 12: Search results
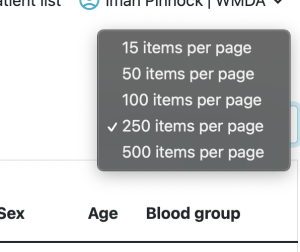
Maximum number of records
Actions | Description |
Change maximum number of records displayed | The system by default shows you 250 search results. You can expand this to 500 records or reduce it to 14, 50 or 100 records per page.
After you have selected another maximum number, click on the "Get search results" button to retrieve the extra records. PLEASE NOTE: If you do increase the number of results displayed, the search and/or applying of filters will take longer to perform in this case. |
Patient details
In the patient details box, all medical details from your patient that were filled out at the "Add patient" form are shown. (Figure 15). By default, this box is collapsed at the search results page.
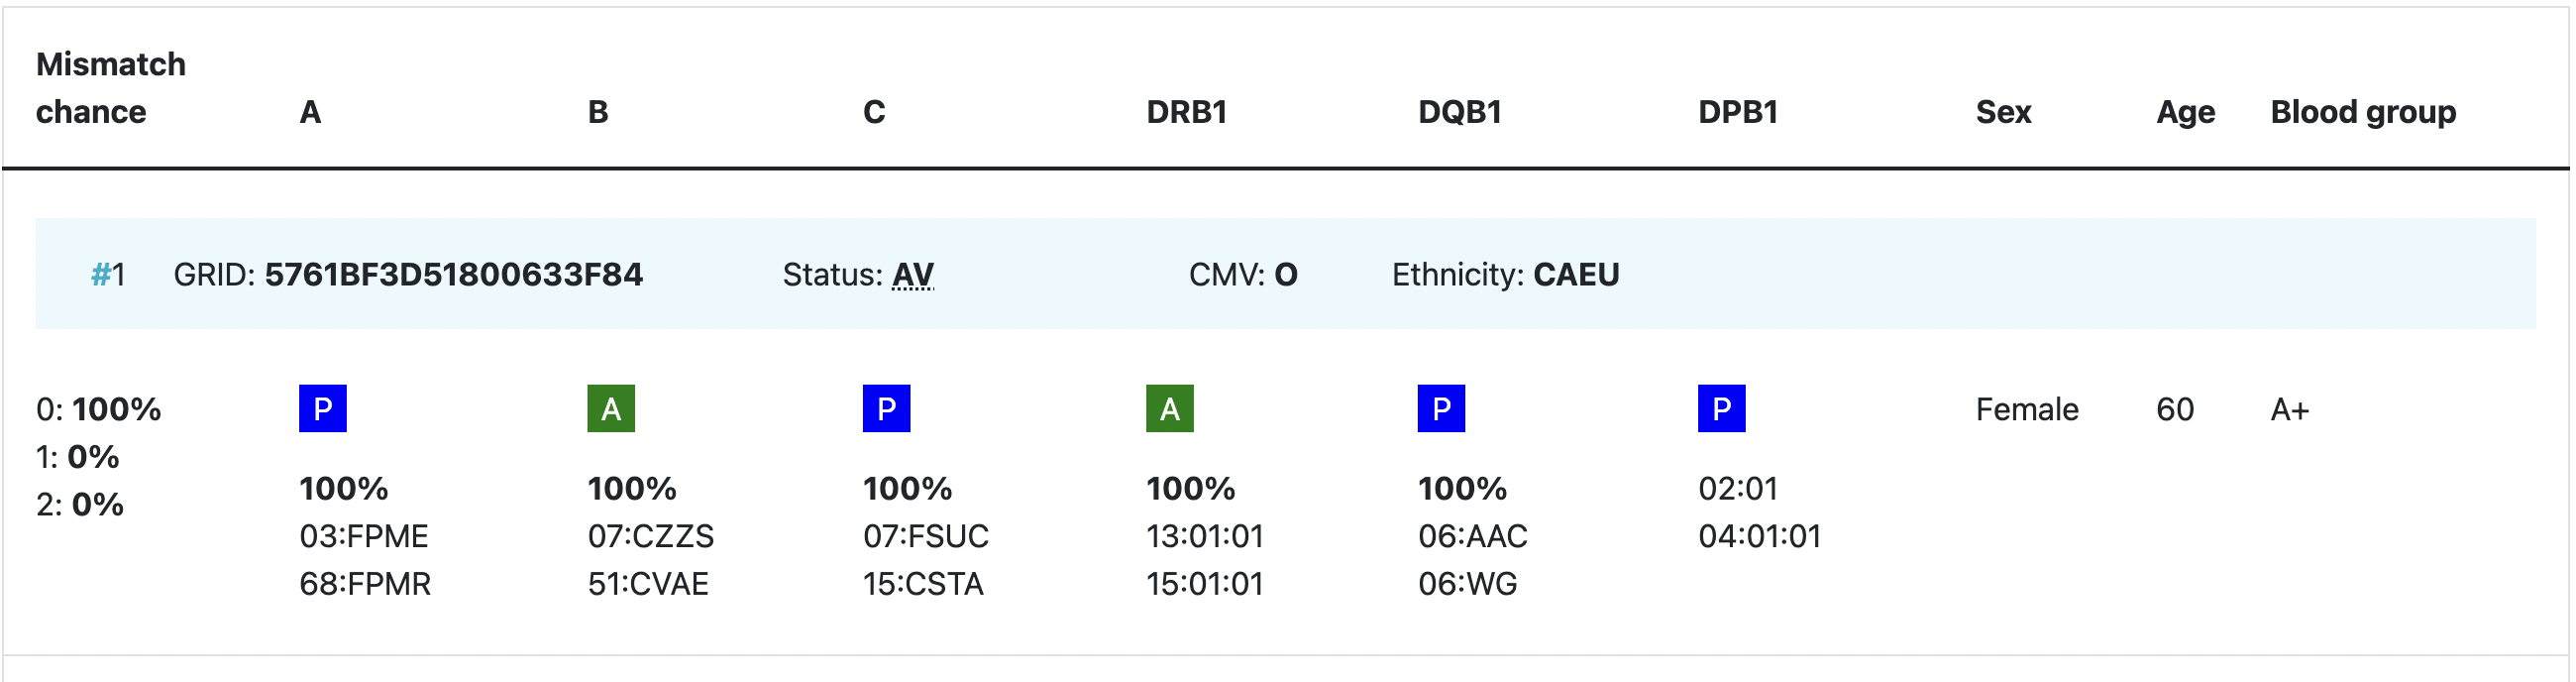
Figure 15: Search results: Patient details
Match results table
An overview of the match results table of donor search results and cord search results are shown in figure 16 and 17. These results are from searches using the haplotype frequency algorithm. When you are using the allele frequency algorithm, the percentages for the probability of mismatches are not shown.
By default the donor match results are sorted by:
1. HLA
2. Probability in 10% intervals (default)
3. Donor age in 5 year intervals
By default the cord match results are sorted by:
1. HLA (6/6, 5/6, 4/6)
2. Number of total nucleated cells (TNC) for cords
NOTE: By default, cord search results are sorted at matching categories depending on the selection you made in the "loci to consider" drop-down menu; The probabilities are also based on allele level matching only, so please be aware of this when using the n/6 (at HLA-A, B, DRB1), Class I matched at antigen level and Class II matched at allele level match type.
Overview of donor search match results
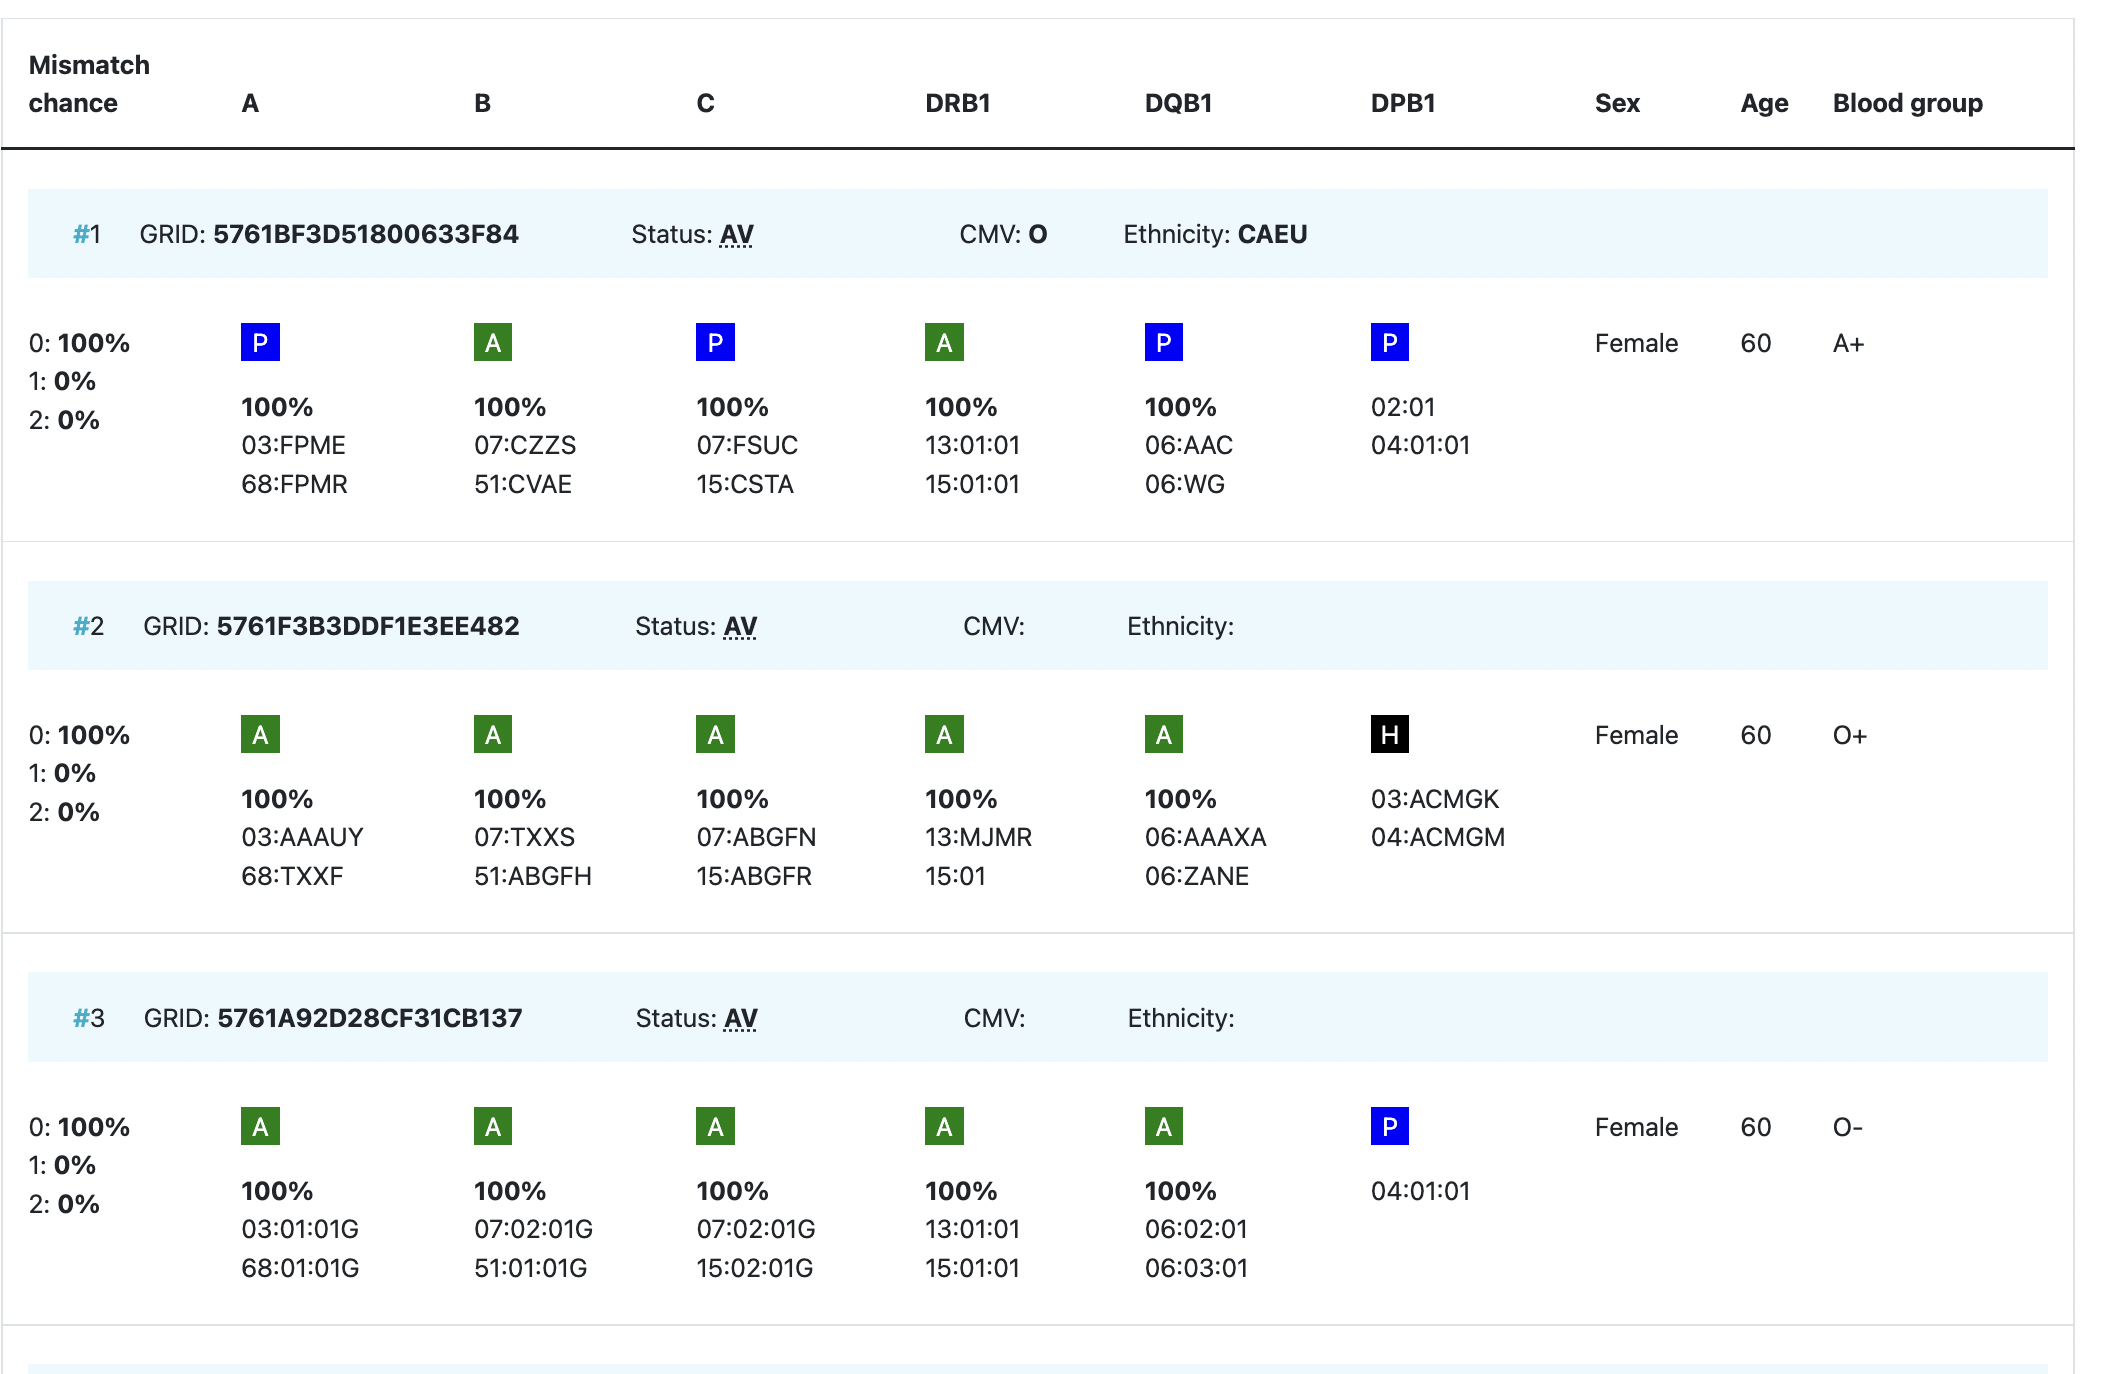
Figure 16: Donor match results table
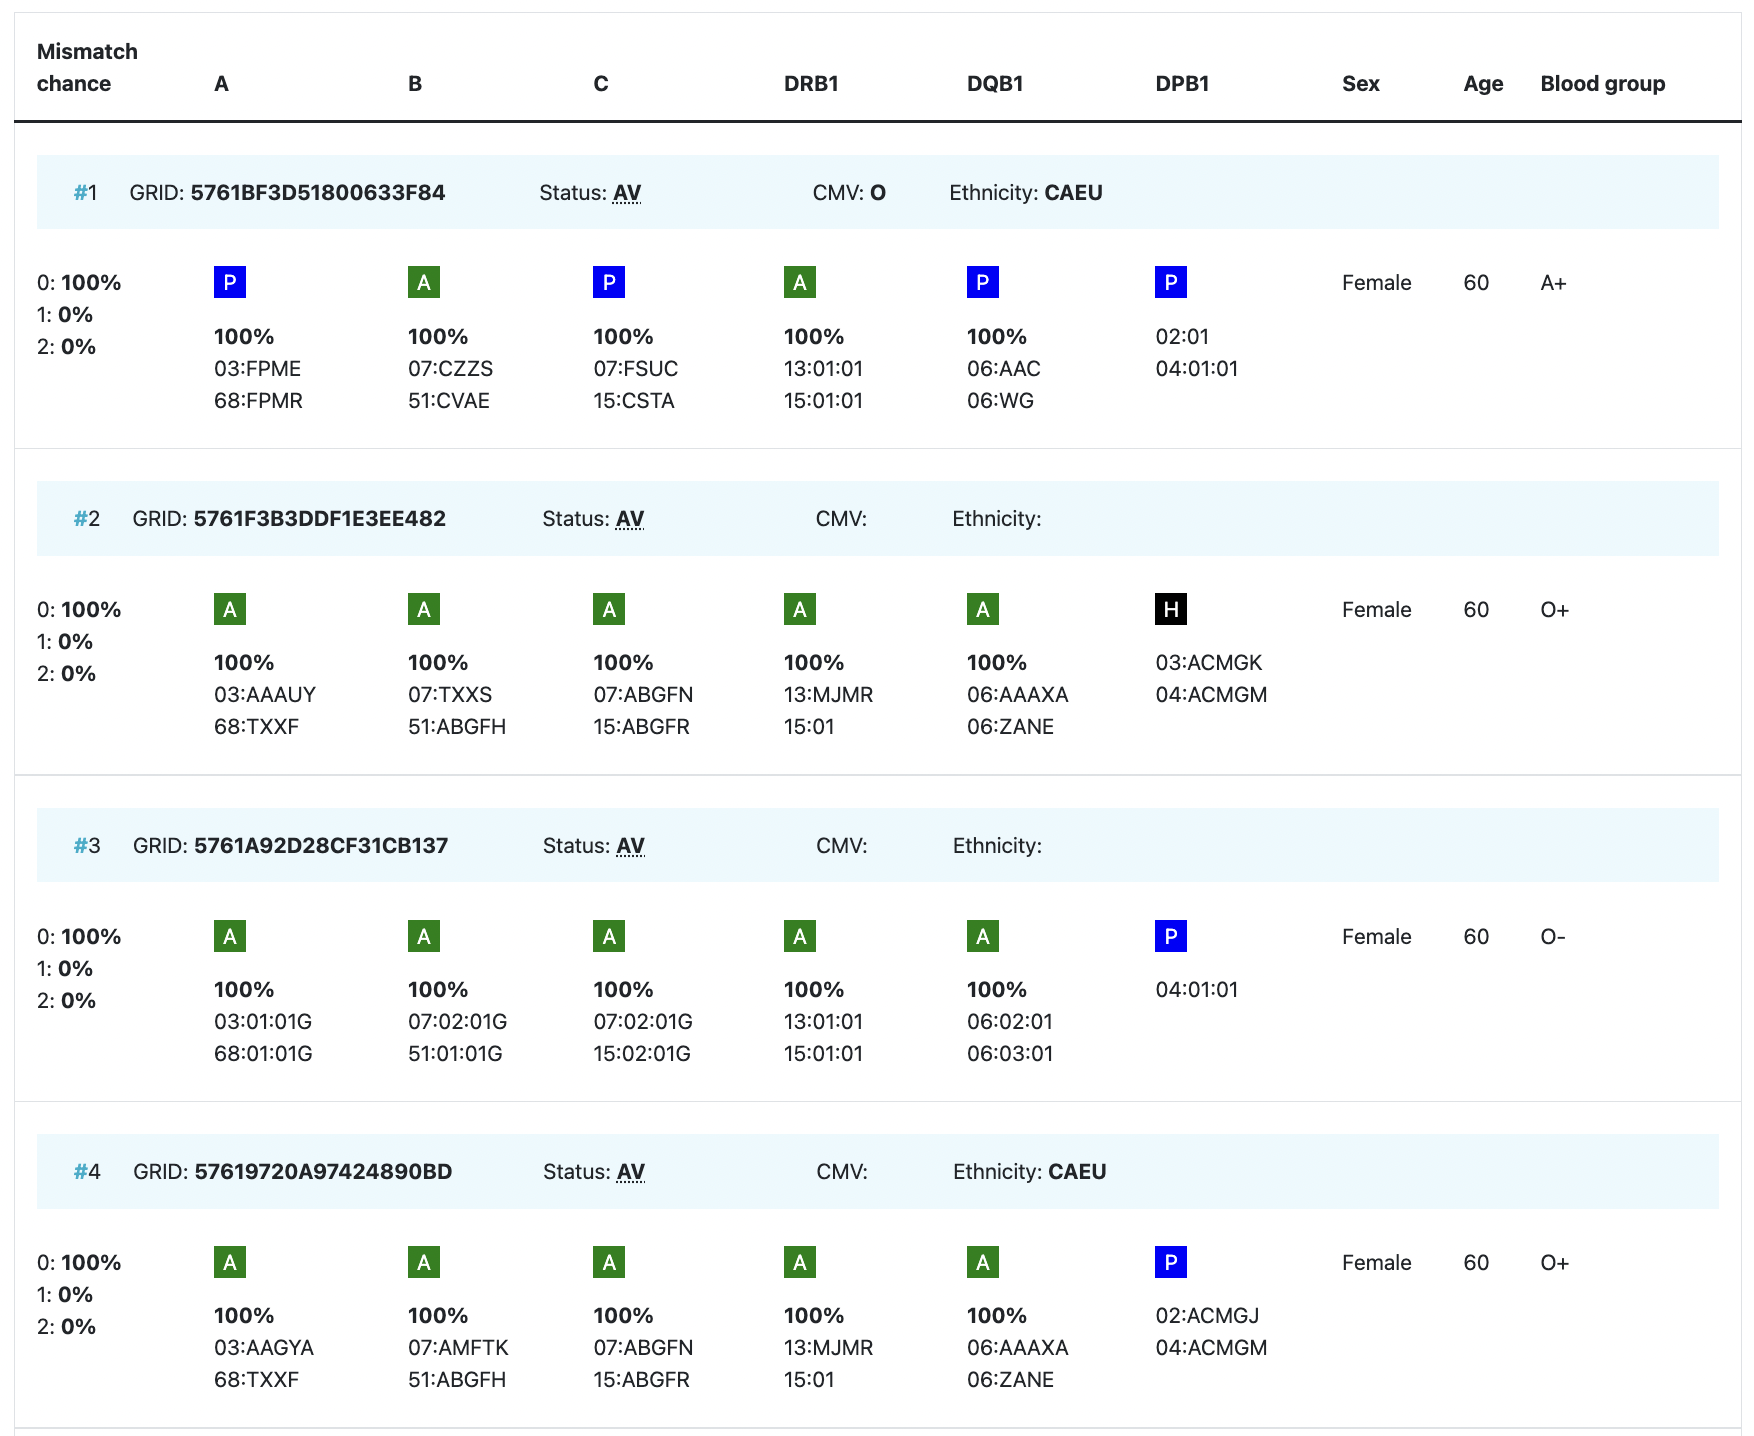
Figure 17: Cord match results table
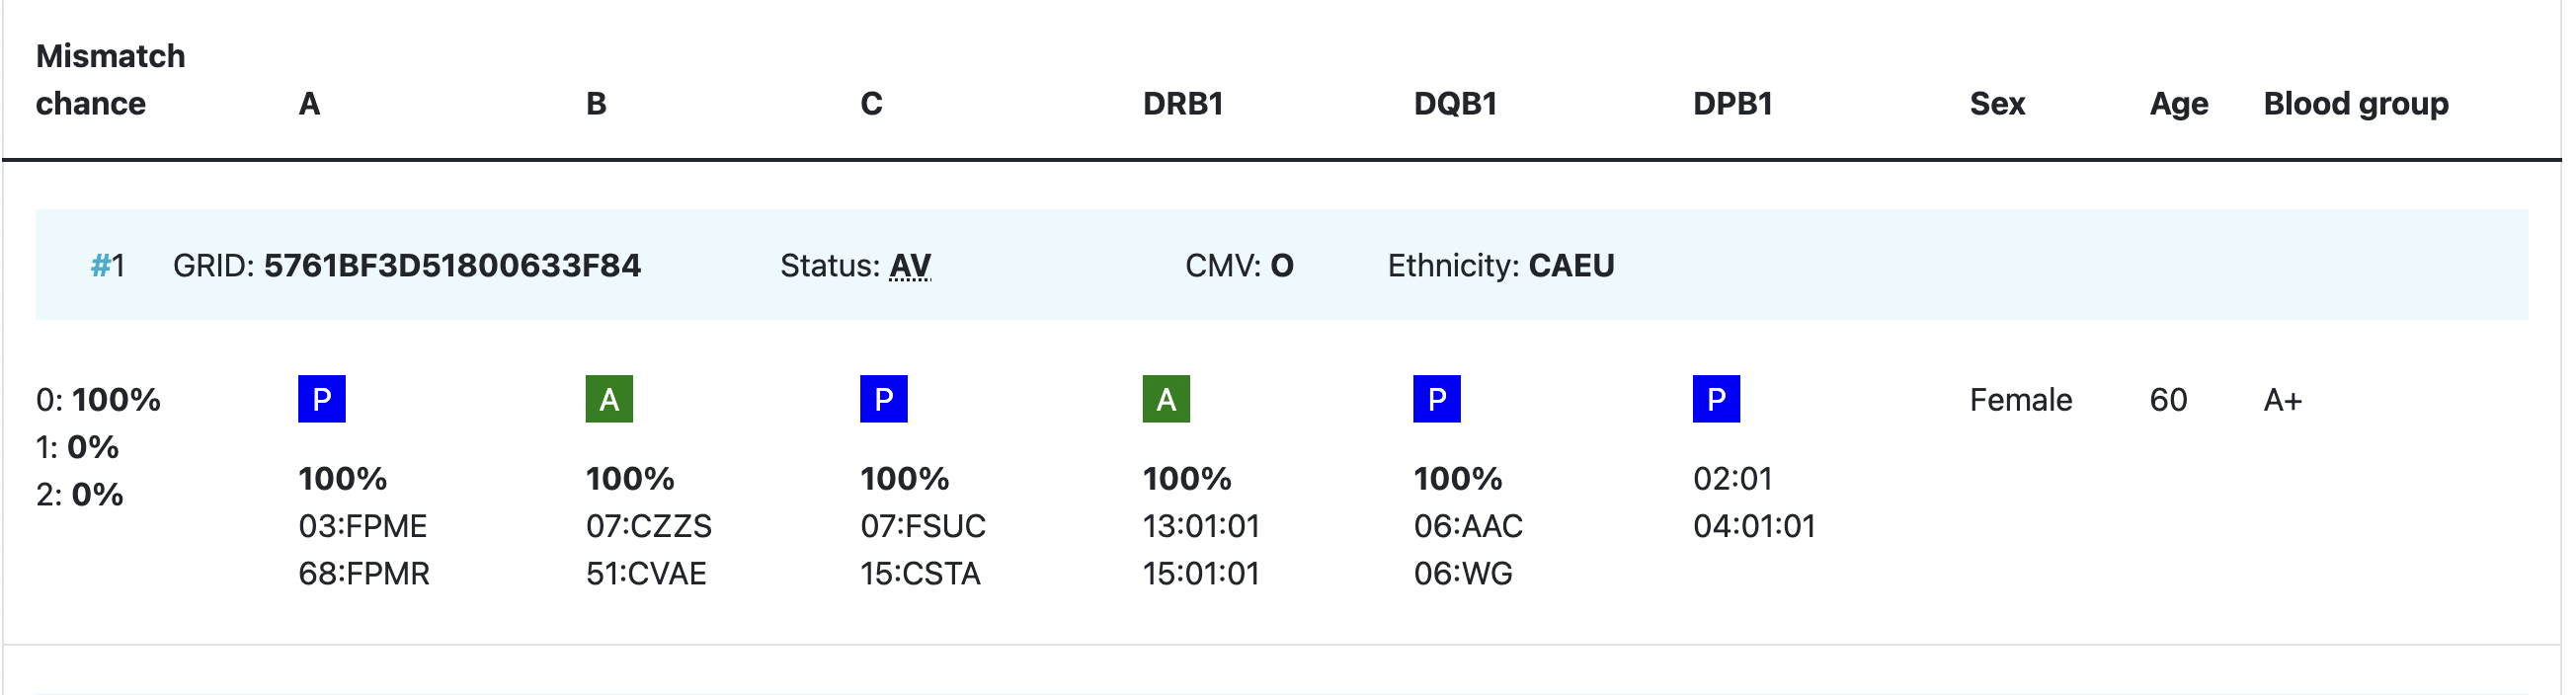
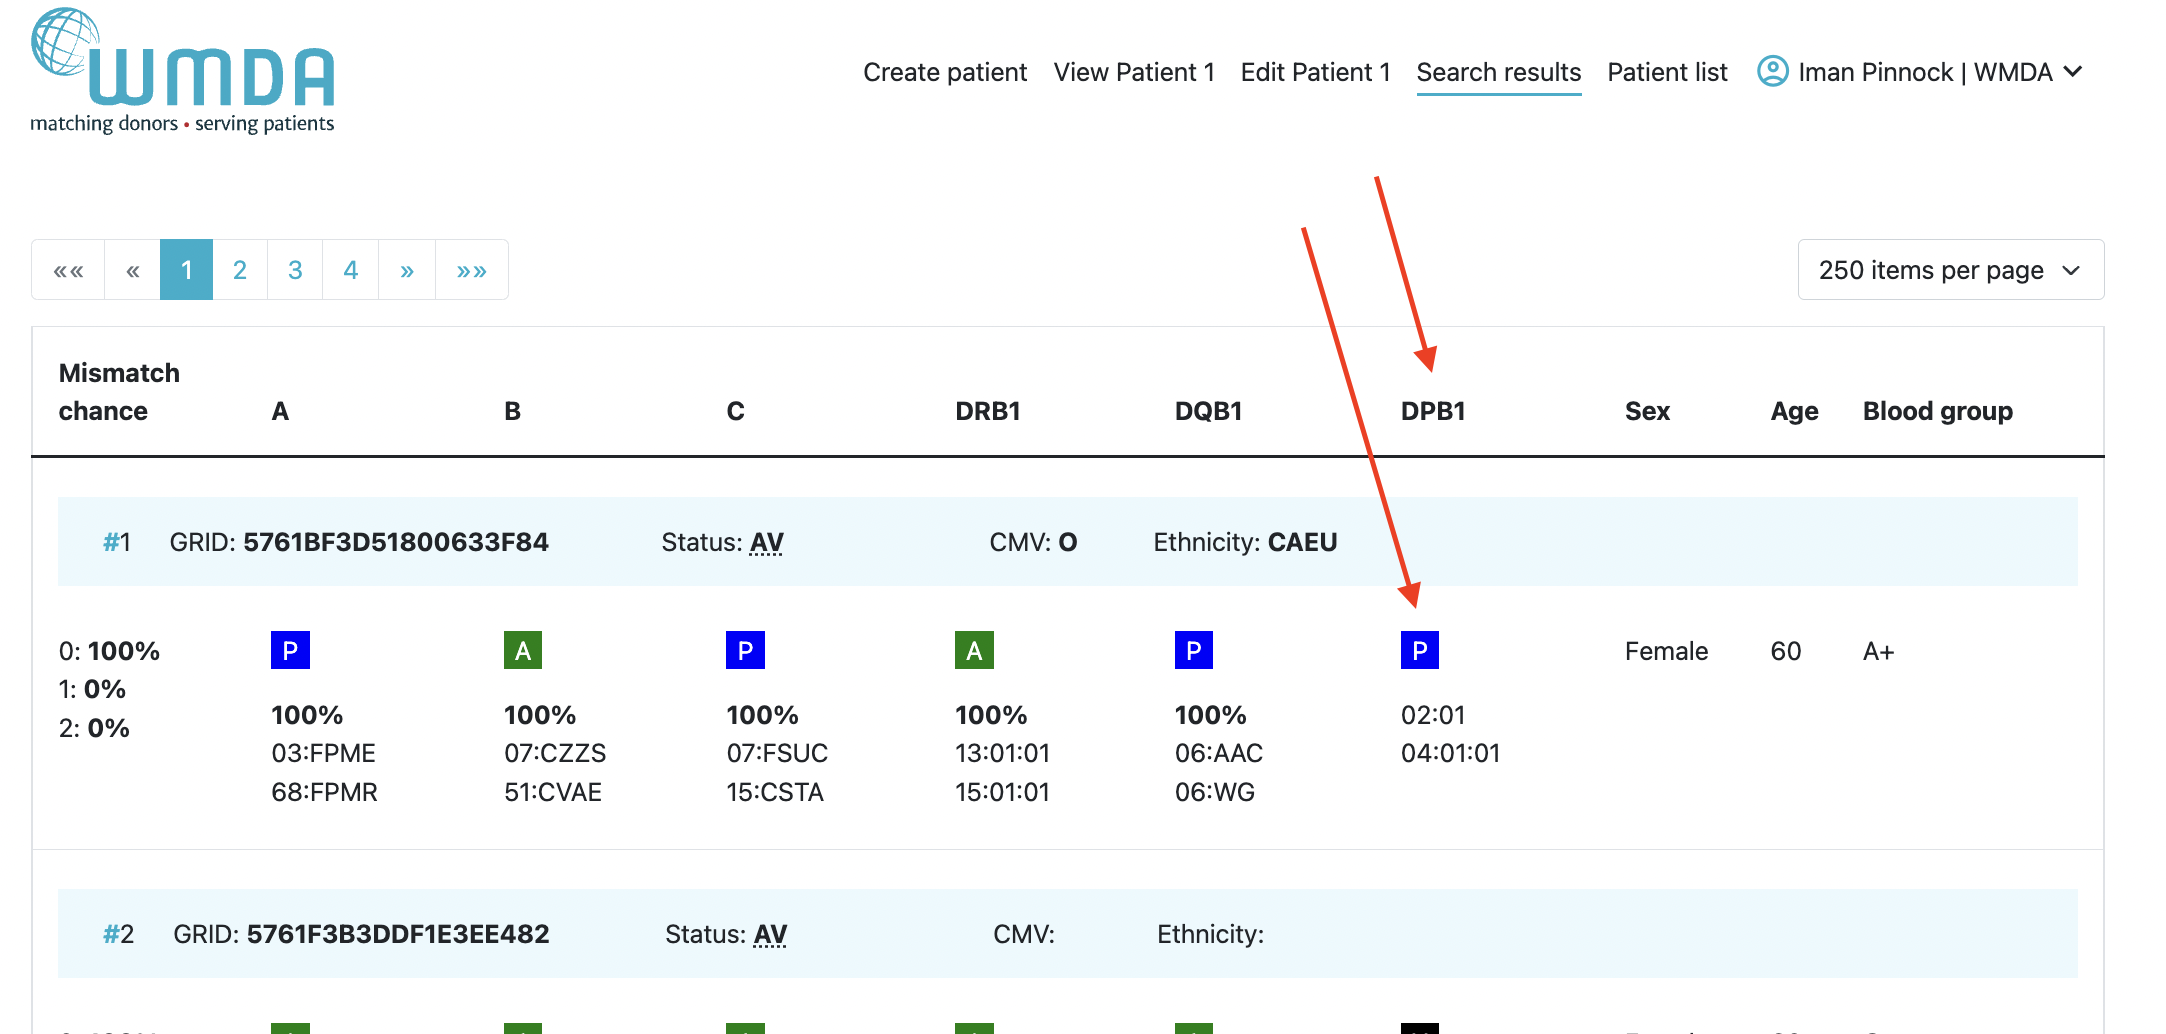
Explanation colours, abbreviations, percentages and codes
Abbreviation / column | Description |
| HLA patient | In the grey bar, you can find the HLA of your patient. This header will move with you when you are looking at results more below. |
Probability of mismatches 0, 1, 2 | Probability of a mismatch at 0 loci, 1 locus, and 2 loci. The percentages are only shown when you are using the haplotype frequency algorithm and are based on the match type you have been chosen (out of 6 then 6 loci are considered; out of 10 then 10 loci are considered).
The five squares above the probability percentages are representing, respectively, locus A, B, C, DRB1, and DQB1. They are showing in letter/colour codes if a certain loci of a donor/cord is likely to match with your patient or not.
NOTE: When you are using for cords the match type ≥4/6 (at HLA-A, B, DRB1), Class I matched at antigen level and Class II matched at allele level, the probabilities are calculated based on allele level match for all loci and not only for DRB1. |
| DPB1 TCE3 grading model | Various studies have shown a potential beneficial effect if the HLA‐DPB1 classification based on T‐Cell Epitopes (TCE) is considered in donor selection. Among the 9/10 and 10/10 donor candidates, those with a permissive DPB1 constellation are preferred over those showing a non‐permissive DPB1 constellation. The implementation in OptiMatch is called "DPB1 TCE3 grading" and is based on the following publications and uses the new score based algorithm that was realised with 3 TCE groups [3].
DPB1 TCE3 evaluation is performed and displayed for A, B, DR typed donors under the following conditions:
|
Age | Age of donor/cord |
Gender | Sex: M = male, F = female |
Blood group | Blood group, e.g. A+ = blood group A, rhesus positive, B- = blood group B, rhesus negative |
CMV | CMV status Possible values: As seen in the second entry, a value for the CMV status is not required to be entered.
|
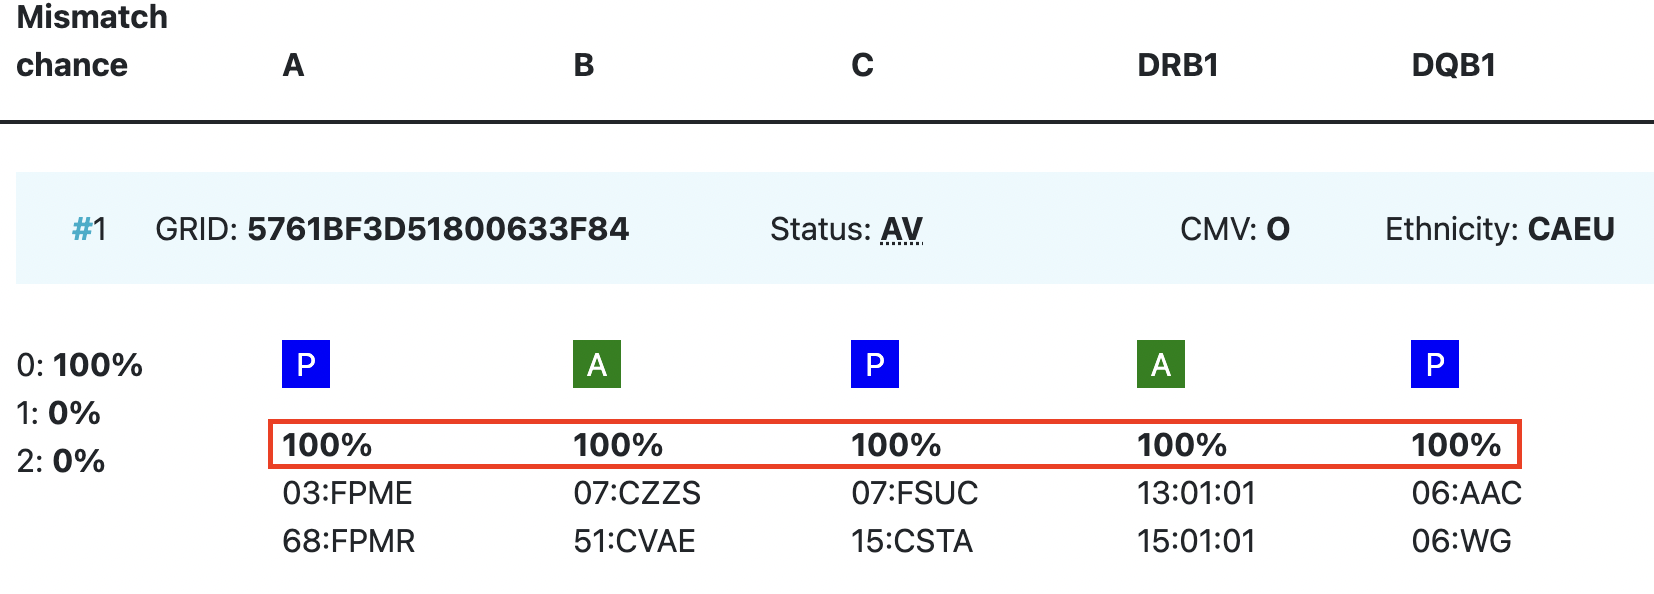
| Probability of match per locus | If you expand the donor/ cord details, the probability of a match per locus becomes visible:
This also correspondents with the letter/colour code from the five squares in the column probability of mismatches. These probabilities are only calculated for the 5 loci A, B, C, DRB1, and DQB1. |
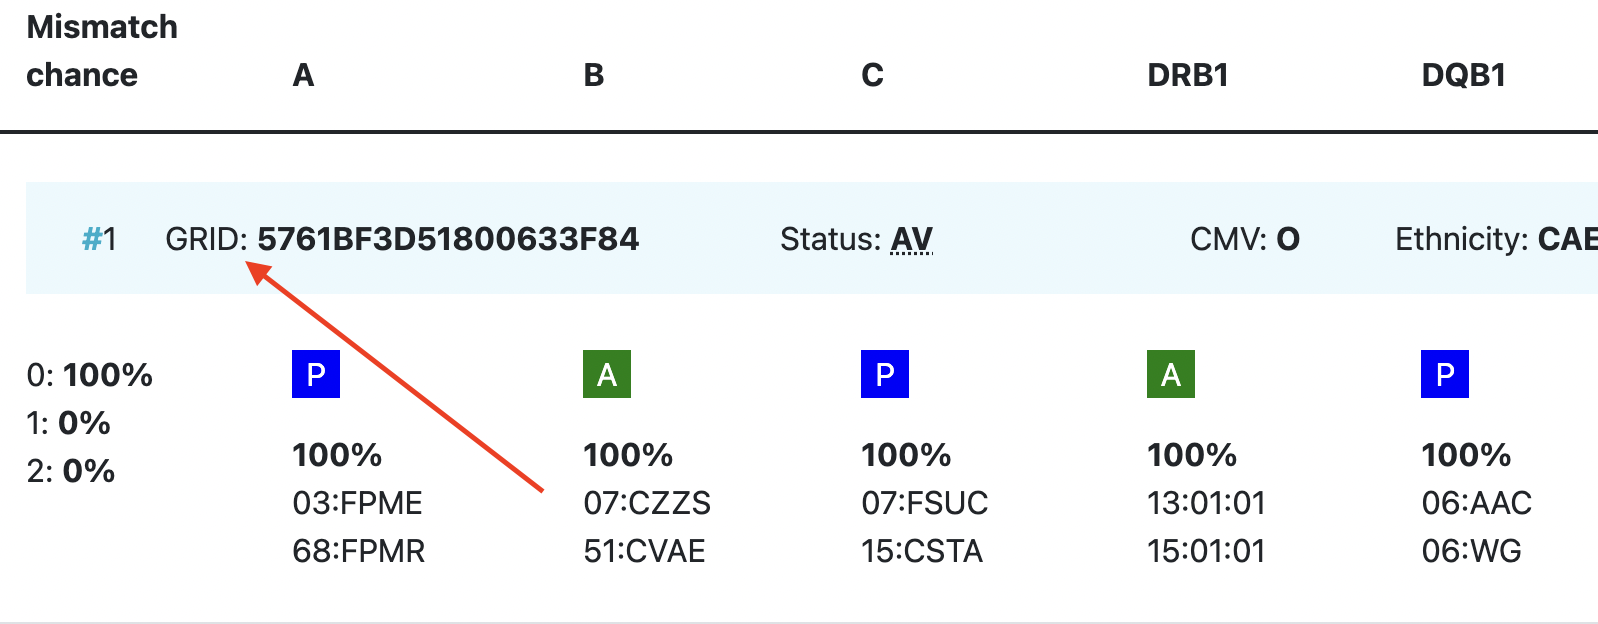
| GRID | GRID, Global Registration Identifier for Donors, is a new ID for donors (not for CBUs) that is globally unique. The first 4 numbers of the GRID refer to the ION of the organisation where the donor is registered. From July 1st 2019, GRID will become the primary ID for communication purposes between organisations.
|
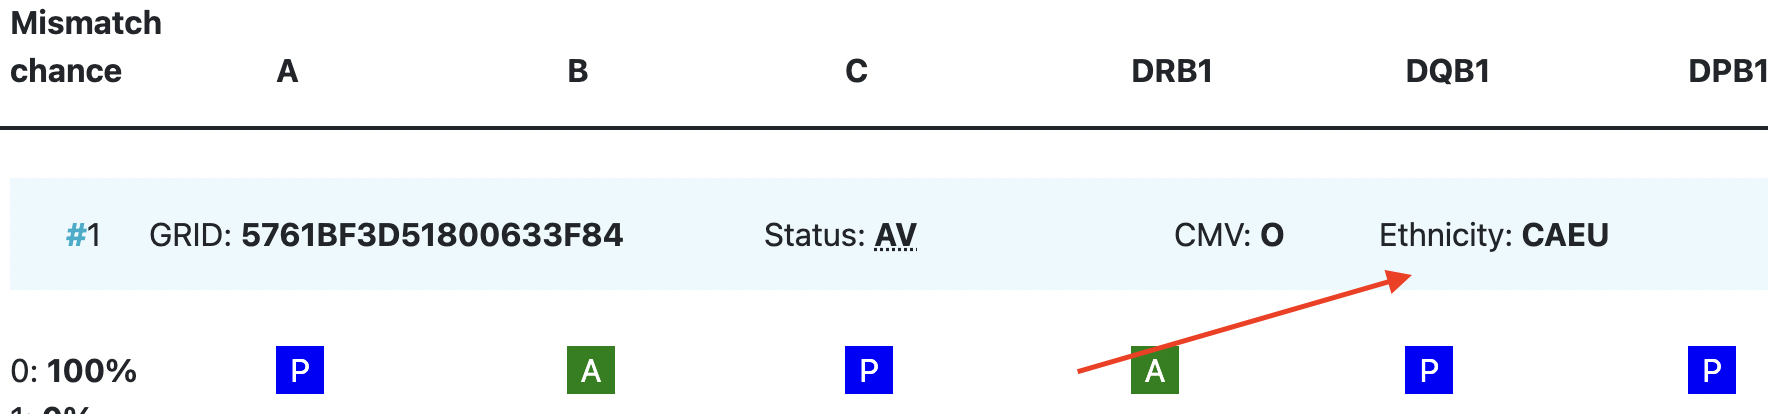
Ethnicity | Ethnic group: The system uses the same ethnic groups as defined for the EMDIS system:
|
| Status | Status of a donor or CBU. For donors, the status can be available (AV), reserved for a patient (RS), temporarily unavailable (TU) |


Links to assist you in your searches
The following list contains useful links to assist in finding a potentially matched donor:
- WHO HLA Nomenclature
- Immuno Polymorphism Database (IMGT/HLA)
- Allele Frequencies in worldwide populations
- Bioinformatics and HLA expertise
- HLA Frequency Maps
- The Common and Well-Documented (CWD) allele catalogue
- Current Topics in Histocompatibility and Transplantation (CTHT)
International professional organisations
In the field of HLA a few professional organisations are active in order to provide information on immunogenetics and histocompatibility.
- American Society for Histocompatibility and Immunogenetics (ASHI)
- European Federation For Immunogenetics (EFI)
- British Society for Histocompatibility and Immunogenetics (BSHI)
- European Society for Blood and Marrow transplantation (EBMT)
- Center for International Blood and Marrow Transplant Research (CIBMTR)
- World Marrow Donor Association (WMDA)
- American Cancer Society (ACS)
- American Society for Blood and Marrow Transplantation (ASBMT)
- International Society for Experimental Hematology (ISEH)
- Worldwide Network for Blood and Marrow Transplantation (WBMT)
DNA Reference tables
WMDA has been creating DNA reference tables, named DNA_hlacore.zip and DNAinclrenamed_hlacore.zip
These expanded tables were meant for fast lookup, and are based on the following sources :
FAQ from Users of the Search & Match Servcie
Educational newsletters
No 1: The Sorting order within a donor search report
No 2: Printing of search reports
No 3: New feature added: DPB1 TCE3 model
No 3b: DPB1 TCE3 model update and revised information
| Date | Version | Description | Author |
|---|---|---|---|
| 2016-11-09 | 1.0 | First version for launch | JK |
| 2016-12-05 | 1.1 | Updated due to improvements system | JK |
| 2017-01-06 | 1.2 | Updated due to last release of 2017-01-06 | JK |
| 2017-10-13 | 1.3 | Updated due to last release of 2017-10-13 | JK |
| 2020-02-25 | 1.4 | Updated screenshots and added useful links | LF/MM |
| 2022-04-08 | 1.5 | Updated screenshots and descriptions | IP |